Table of Contents
- The Allure of a Classic Cookie
- Why These Simple Cookies Are a Keeper
- The Secret to the Best Butter Cookies
- How to Shape the Perfect Sand Dollar Cookie
- Versatility: An Easy Recipe for Every Occasion
- Baking, Sharing & Storing Tips
- Jump to the Recipe
- Jump to Notes & Tips
Key Takeaways
This easy cookie recipe yields classic, buttery Sand Dollar Cookies. They are simple to make with pantry staples, require no chilling time, and feature a beautiful, seashell-inspired design. Perfect for holiday desserts, cookie exchanges, or a quick treat, these cookies are a foolproof choice for bakers of all levels. The recipe is customizable and stores well.
The Allure of a Classic Cookie
There’s something undeniably charming about a classic recipe that stands the test of time. Among the pantheon of easy cookies, Sand Dollar Cookies hold a special place. Their simple, crumbly texture and elegant seashell shape make them more than just a dessert—they’re a little piece of nostalgia. Here on Patricia Universe, I, Patricia, believe the best recipes are the ones that bring joy with minimal fuss, and this timeless treat does exactly that. It’s a great recipe for creating lasting memories in the kitchen.
Why These Simple Cookies Are a Keeper
In a world of complicated bakes, these cookies are a breath of fresh air. This is the ultimate easy cookie recipe because it delivers maximum flavor and visual appeal with straightforward steps. You don’t need any special equipment beyond a bowl and a fork, and the dough comes together in minutes. Whether you’re baking with kids, preparing for a last-minute gathering, or just craving a homemade sweet, this recipe won’t let you down. It’s the kind of simple baking project that feels both rewarding and relaxing.
The Secret to the Best Butter Cookies
The magic of a perfect butter cookie lies in its texture—tender, sandy, and rich. For the best cookie dough, use high-quality, room-temperature butter. Creaming it properly with the sugar is the first crucial step to achieving that light, melt-in-your-mouth quality we all love. This recipe keeps the ingredient list short, allowing the pure, rich flavor of butter to shine, which is the hallmark of a truly great classic cookie. Be careful not to overwork the flour; mix just until combined for the most delicate crumb.
How to Shape the Perfect Sand Dollar Cookie
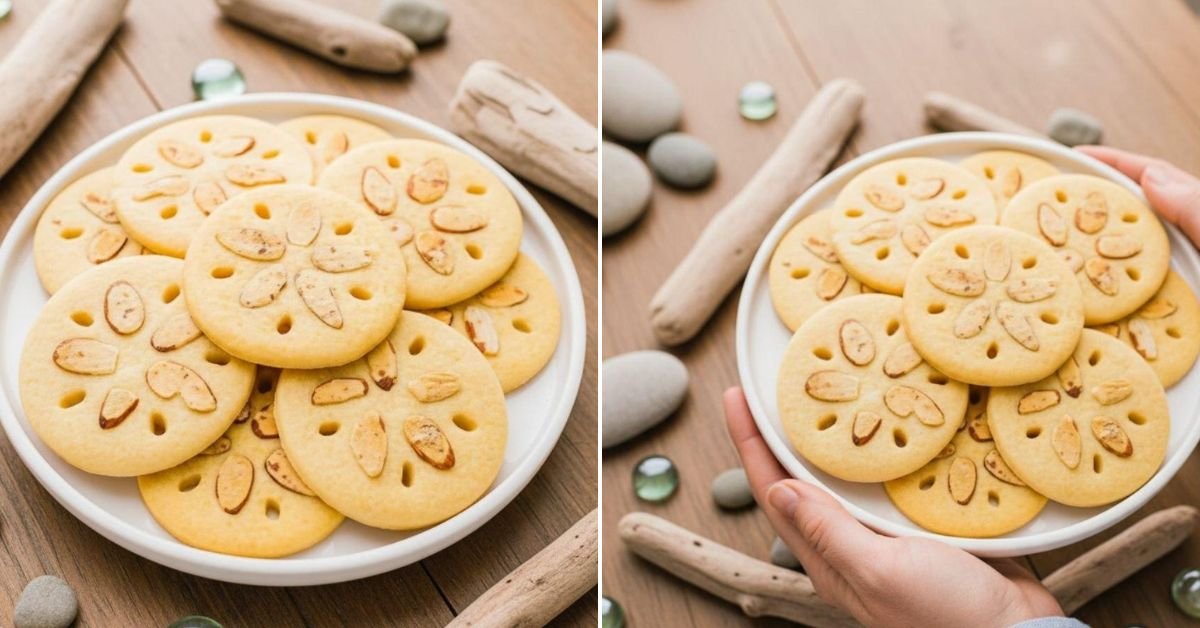
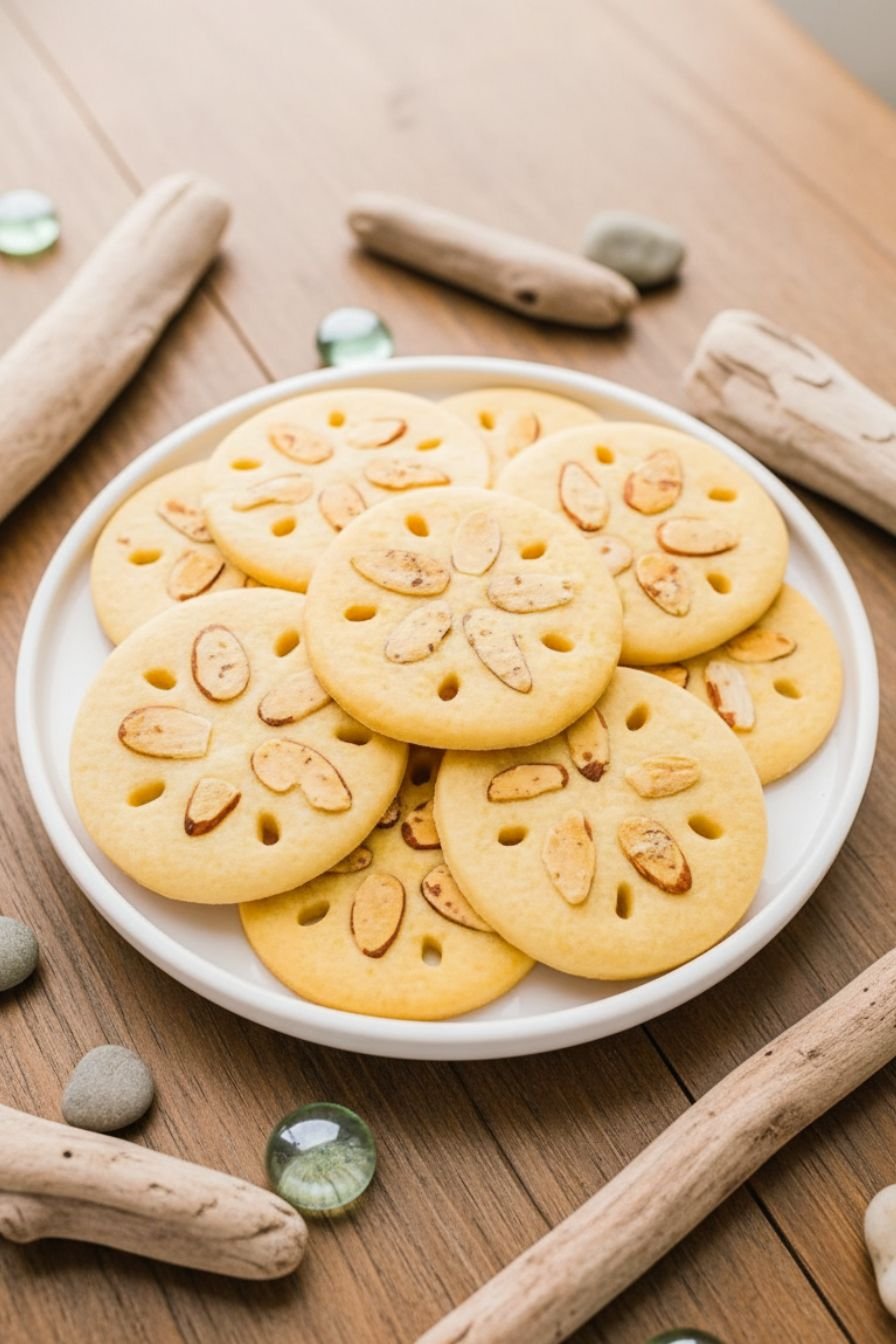
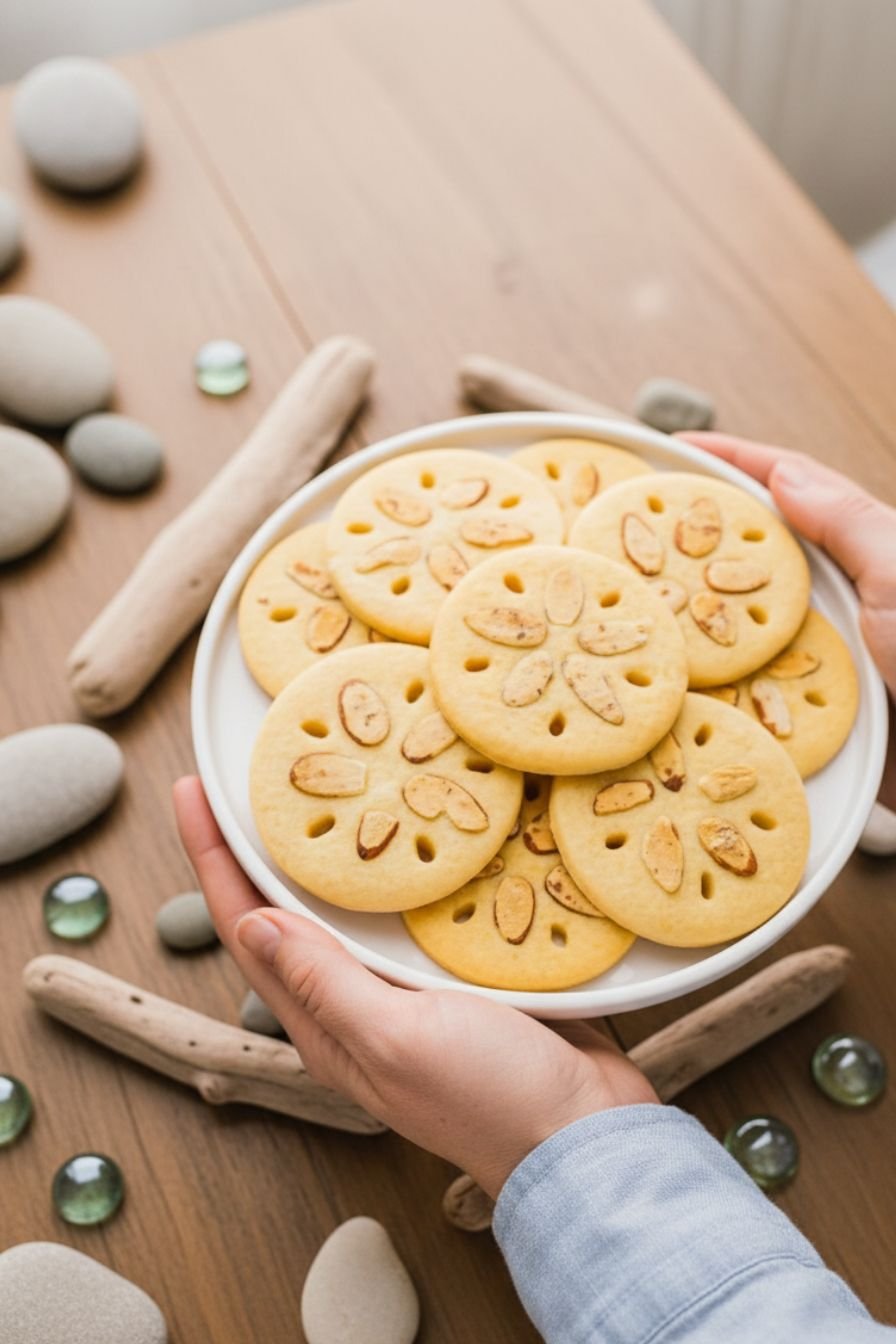
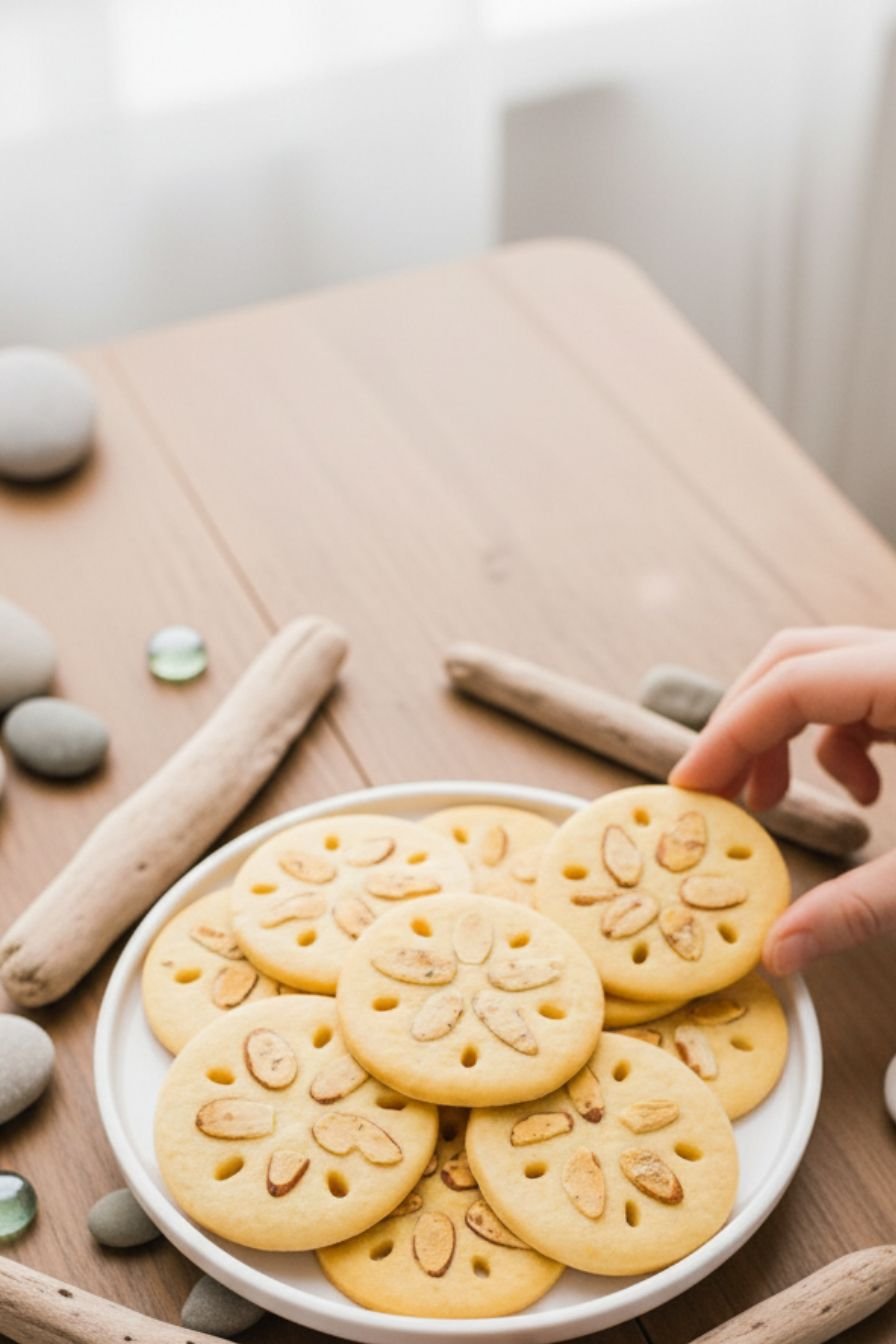
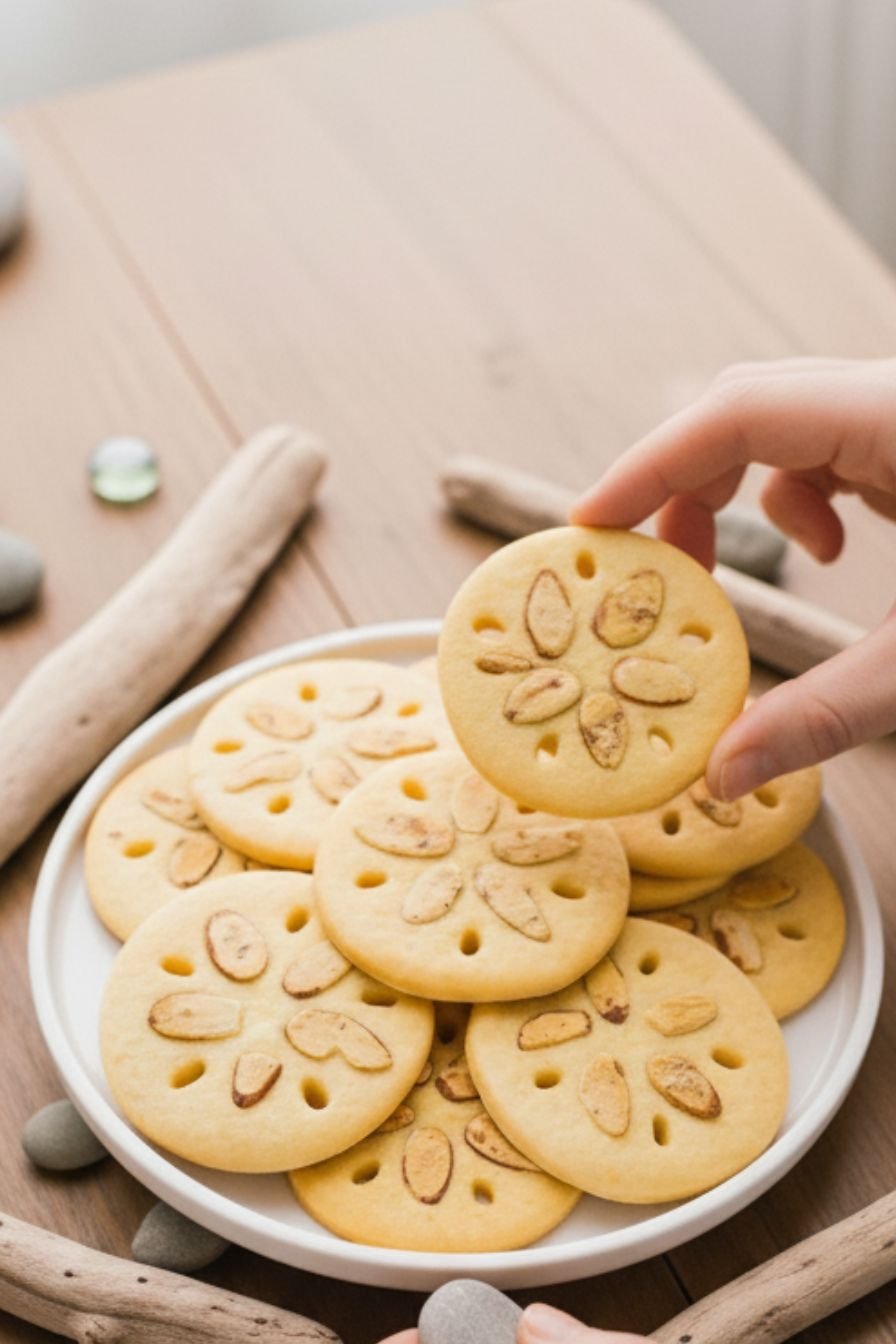
Part of the fun is creating that iconic seashell design. The process is wonderfully simple: roll, flatten, and etch. Using the bottom of a glass gives you a perfectly round base. Then, with just the tines of a fork, you can press the signature lines that transform a plain disc into a beautiful sand dollar. It’s a simple baking technique that yields impressive results, making these one of my favorite cookies to decorate. Don’t worry about perfection; each cookie will have its own charming character.
Versatility: An Easy Recipe for Every Occasion
The beauty of this recipe is its adaptability. While fantastic on their own, these cookies are a blank canvas. For holiday desserts, sprinkle them with colored sugar. For a cookie swap, they travel beautifully and always get compliments. Looking for quick recipes for a party? Double the batch—they’re a guaranteed crowd-pleaser. You can even change up the nuts in the center or add a hint of citrus zest to the dough. This flexibility is what makes it a true kitchen staple on Patricia Universe.
Baking, Sharing & Storing Tips
Once you’ve mastered this easy cookie recipe, you’ll want to make them often. To ensure success every time, bake them just until the edges are faintly golden for the ideal soft texture. Let them cool completely on the baking sheet for a few minutes to set before moving them. These cookies store wonderfully in an airtight container, staying fresh for up to a week—if they last that long! They also freeze beautifully, both as dough balls or after baking, making them perfect for make-ahead party desserts.
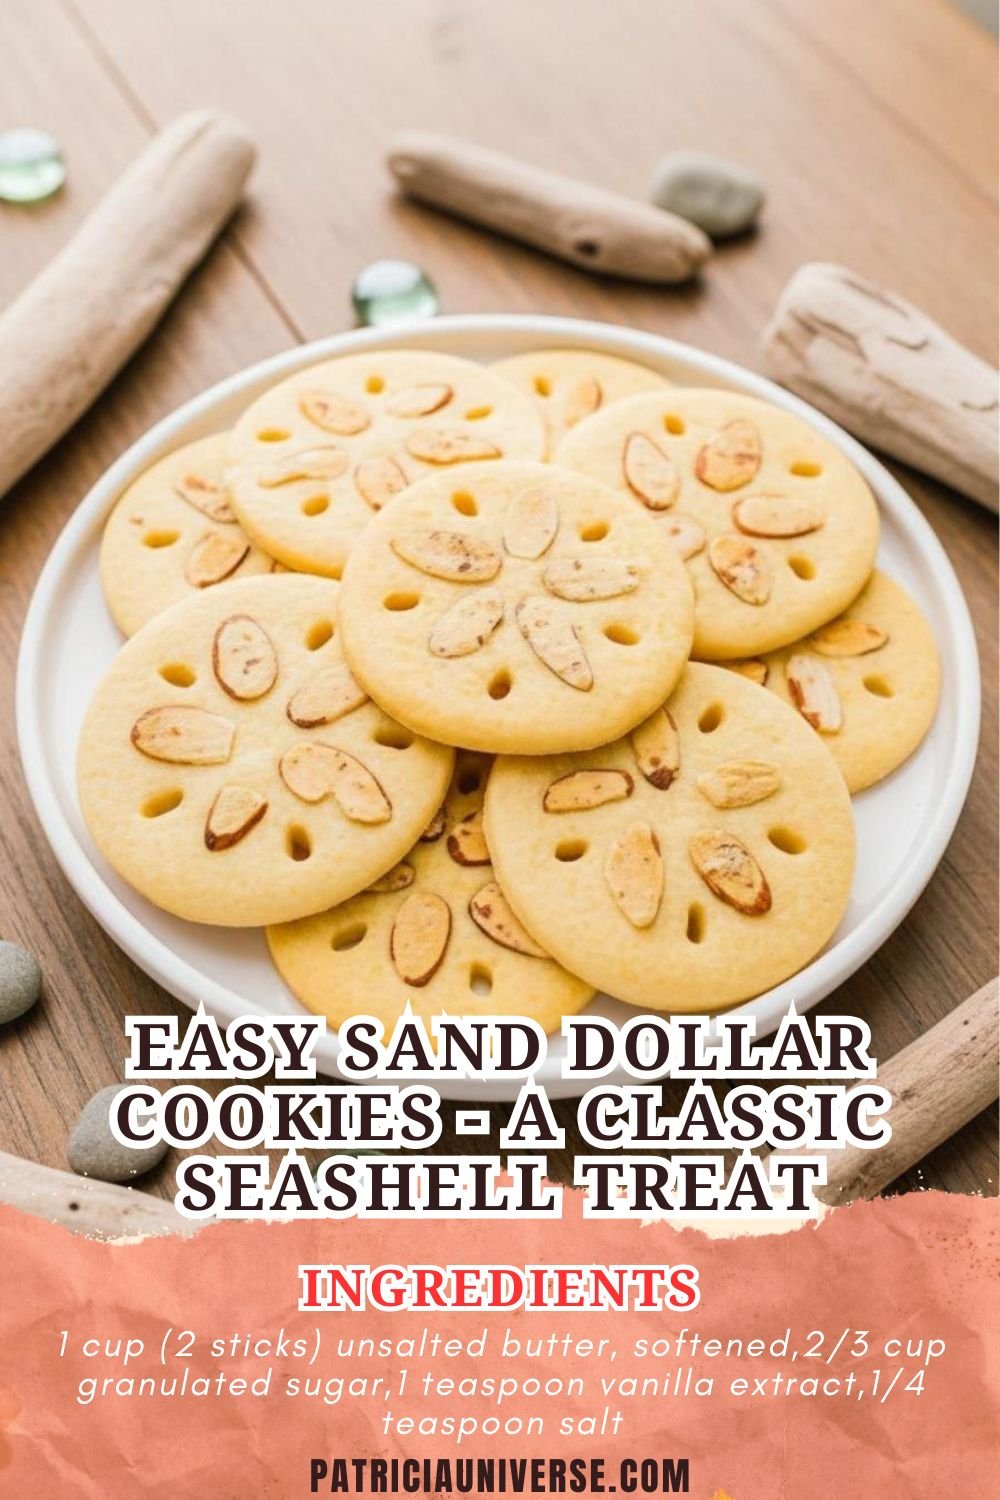

Sand Dollar Cookies: An Easy Classic Recipe
Ingredients
For the Cookies
- 1 cup (2 sticks) unsalted butter, softened
- 2/3 cup granulated sugar
- 1 teaspoon vanilla extract
- 1/4 teaspoon salt
- 2 1/2 cups all-purpose flour
For the Coating and Decoration
- 1 large egg white, lightly beaten
- 1/2 cup finely chopped pecans or almonds
- Granulated sugar, for sprinkling (optional)
Instructions
Make the Dough
- In a large bowl, beat the softened butter and sugar together with a mixer until light and fluffy, about 2-3 minutes.
- Beat in the vanilla extract and salt.
- Gradually add the flour, mixing on low speed just until the dough comes together. Be careful not to overmix.
Shape the Cookies
- Preheat your oven to 350°F (175°C). Line two baking sheets with parchment paper.
- Take about 1 tablespoon of dough and roll it into a smooth ball.
- Place the ball on the prepared baking sheet. Using the bottom of a glass or a flat measuring cup, gently flatten the ball into a disc about 1/3-inch thick.
- Using the tines of a fork, press lines into the cookie to create a ‘sand dollar’ design. Make five lines from the center outward, like spokes on a wheel, and then a circle around the edge to define the shape.
- Repeat with the remaining dough, spacing cookies about 1 inch apart.
Decorate and Bake
- Lightly brush the top of each cookie with the beaten egg white.
- Sprinkle the center of each cookie with the chopped nuts, gently pressing them in so they adhere.
- For extra sparkle, you can sprinkle a little granulated sugar over the cookies.
- Bake for 10-12 minutes, or until the edges are just starting to turn a very light golden brown.
- Allow the cookies to cool on the baking sheet for 5 minutes before transferring them to a wire rack to cool completely.


Leave a Comment