
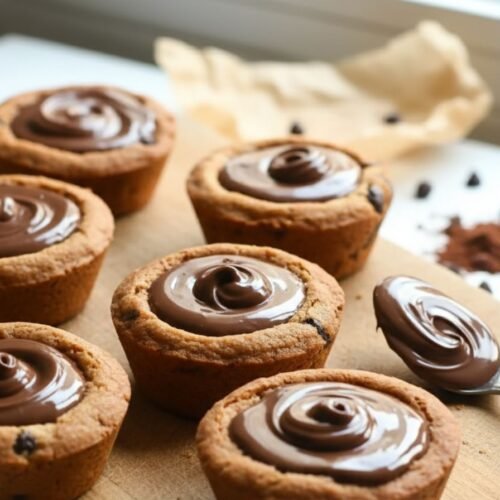
Welcome to Patricia Universe, your go-to destination for fun, foolproof, and flavorful baking ideas! Today, I’m absolutely thrilled to share a recipe that’s been a massive hit in my kitchen: Easy Chocolate Chip Cookie Cups with Nutella. If you’re searching for easy desserts that deliver maximum flavor with minimum fuss, you’ve just hit the jackpot. These little delights are everything you love about a classic chocolate chip cookie—soft, chewy, and packed with chocolate chips—but shaped into a perfect, edible cup and filled with rich, creamy Nutella. The best part? This incredible easy dessert recipes idea comes together in a snap, with no mixer required and absolutely no dough chilling. It’s the kind of stress-free baking project that makes you feel like a genius, whether you’re a seasoned baker or just starting out.
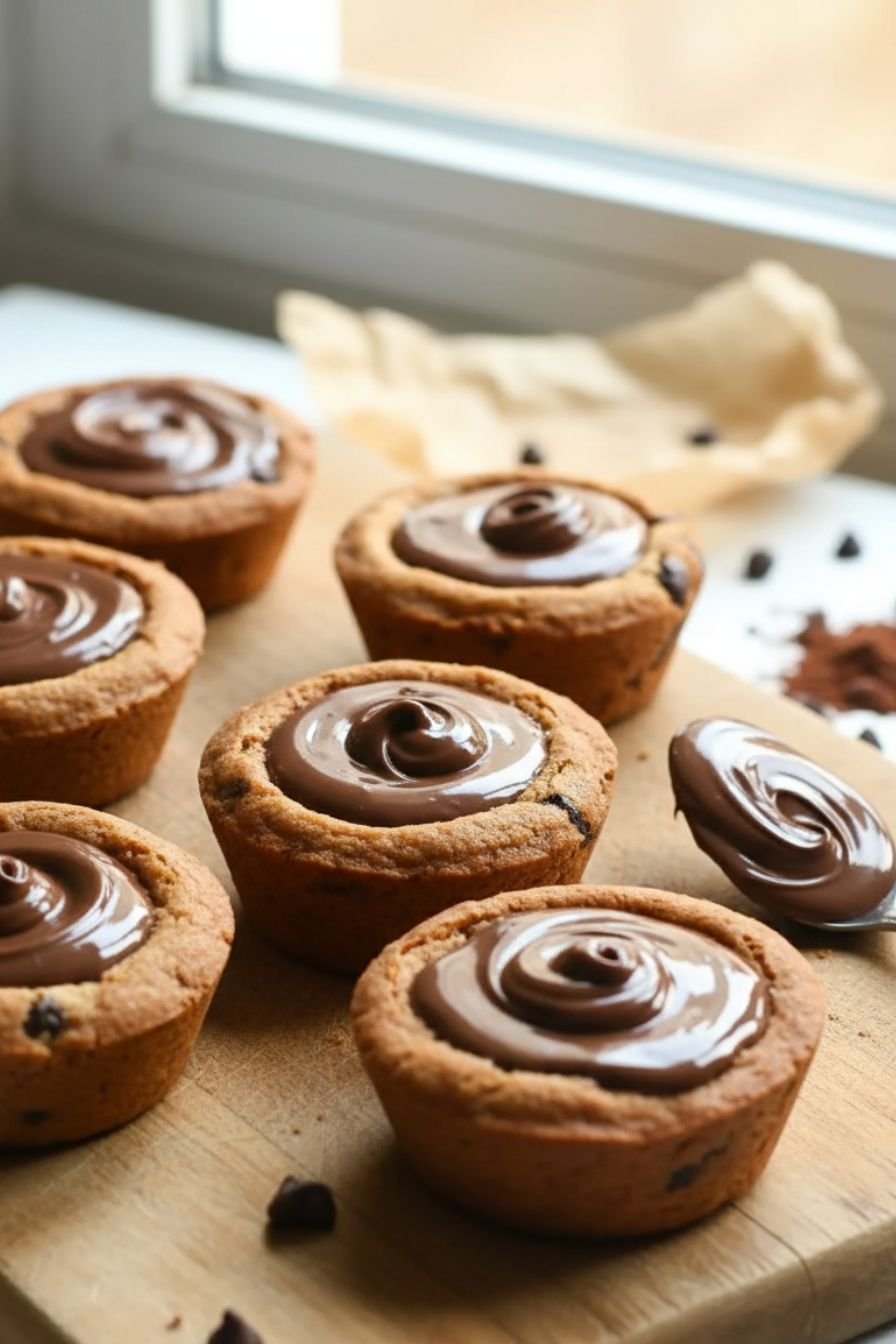
Table of Contents
- Why These Cookie Cups Are a Must-Bake
- The Magic of No-Fuss, Easy Desserts
- Ingredient Spotlight: Simple Pantry Staples
- Step-by-Step: Crafting Your Easy Dessert Recipes Masterpiece
- My Best Tips for Perfect Cookie Cups Every Time
- Beyond Nutella: Endless Filling Ideas for Your Easy Desserts
- How to Store and Freeze Your Cookie Creations
- Frequently Asked Questions
- Notes & Tips for Baking Success
Key Takeaways
- Incredibly Easy: This recipe requires no mixer and no chilling, making it one of the simplest easy dessert recipes you’ll ever make. The dough comes together in one bowl and goes straight into the oven.
- Customizable Fun: While Nutella is the classic filling, these versatile cups are a blank canvas for your favorite spreads, from peanut butter and cookie butter to jams and caramel. This is what makes them such a fantastic easy dessert ideas starter.
- Perfect for Any Occasion: Individually portioned and visually appealing, these cookie cups are perfect for parties, bake sales, holiday treats, or a simple weeknight indulgence. They store well and are even freezer-friendly, making them a great make-ahead option for all your easy desserts planning.
Why These Cookie Cups Are a Must-Bake
There’s something undeniably charming about a dessert that’s both familiar and delightfully unexpected. These cookie cups take the beloved classic chocolate chip cookie and give it a fun, modern twist. Instead of a flat cookie, you get a perfectly shaped vessel ready to be filled with something decadent. The texture is spot-on: edges that are beautifully crisp, giving way to a soft, chewy center that holds its shape against the creamy filling. At Patricia Universe, we believe that baking should be a joy, not a chore, and this recipe perfectly embodies that philosophy. It’s a wonderful activity to do with kids, a guaranteed crowd-pleaser for a party, or a simple way to turn an ordinary afternoon into something special. The aroma of butter, sugar, and chocolate wafting through your kitchen is just the cherry on top.
The Magic of No-Fuss, Easy Desserts
In our busy lives, who has time for complicated techniques and endless steps? That’s the beauty of truly easy desserts. This recipe strips away all the unnecessary fuss. No electric mixer to haul out, no waiting for butter to soften or dough to chill. You simply melt the butter, stir in the sugars, egg, and vanilla, then mix in the dry ingredients. In less than 15 minutes, your dough is ready and portioned into the muffin tin. The oven does the rest of the work. This approach to baking proves that you don’t need to be a pastry chef to create something impressive and delicious. It’s all about smart, simple techniques that deliver outstanding results every single time, making it possible to whip up a batch of these beauties even on the busiest of days.

Ingredient Spotlight: Simple Pantry Staples
One of the things I love most about this recipe is that it relies on ingredients you likely already have in your kitchen. This makes it a go-to for spontaneous baking cravings or for those times when you need a quick dessert for unexpected guests. The base is a classic cookie dough: all-purpose flour provides the structure, while a combination of granulated and light brown sugar creates that perfect balance of crispy edges and a chewy, moist center. A touch of cornstarch is our secret weapon for extra tenderness. Of course, no chocolate chip cookie cup would be complete without a generous handful of mini chocolate chips, ensuring every bite is studded with melty chocolate. And then, the star of the show: a generous spoonful of rich, hazelnutty Nutella, which melts slightly into the warm cookie for a truly unforgettable combination.
Step-by-Step: Crafting Your Easy Dessert Recipes Masterpiece
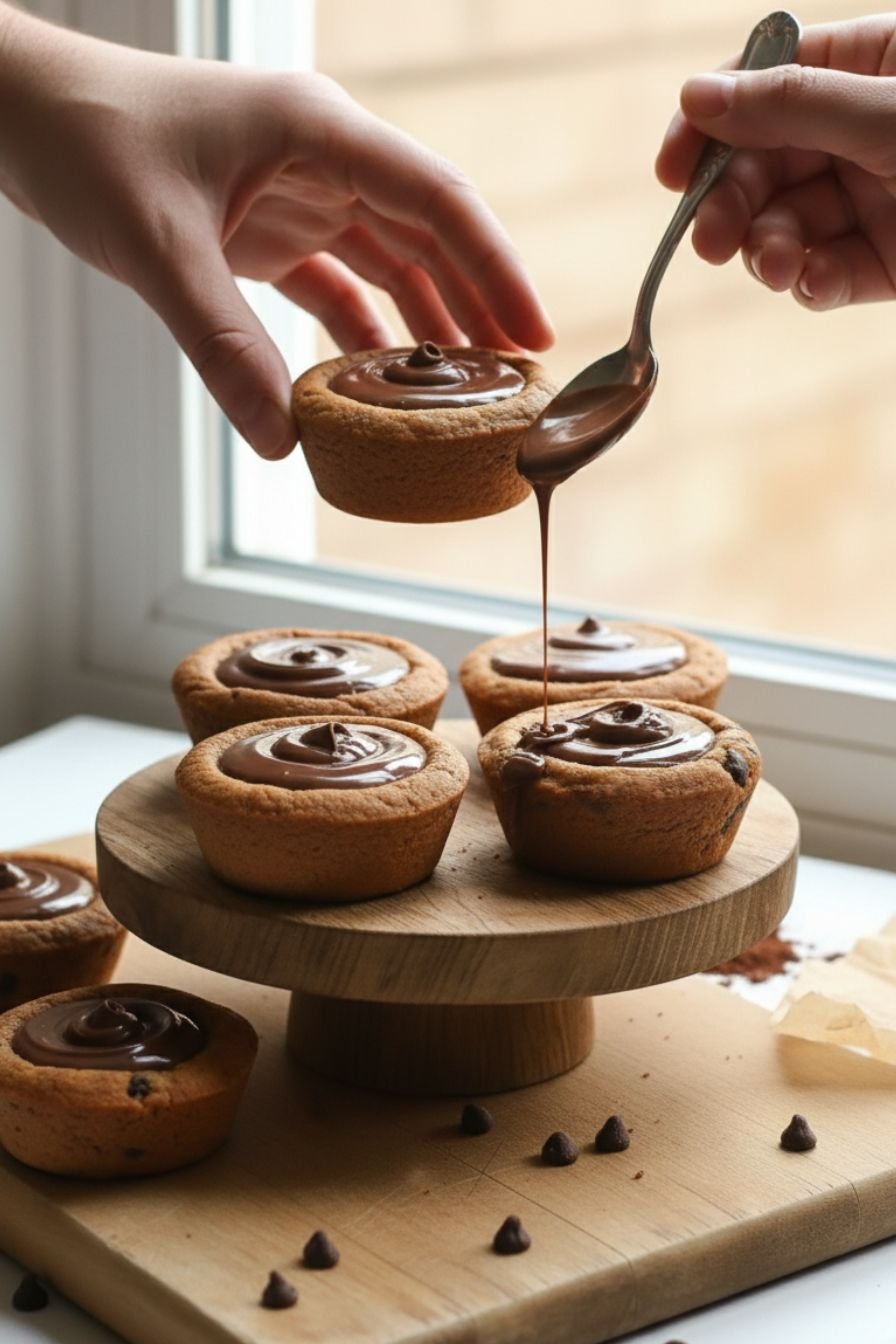
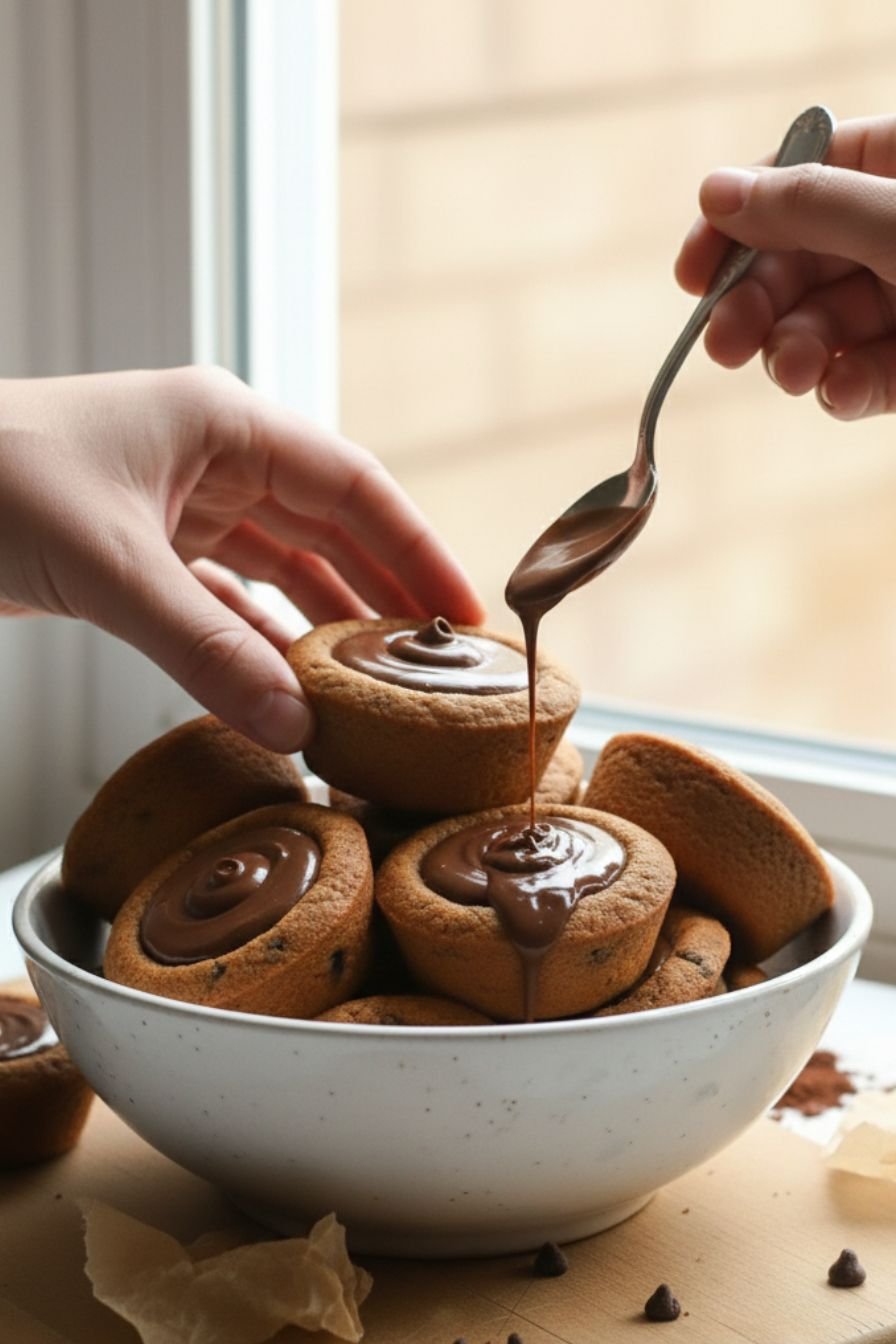
Creating these delightful cookie cups is as fun as it is simple. After mixing your dough, you’ll portion it into a well-greased muffin tin. As they bake, your kitchen will fill with an irresistible aroma. The crucial step comes the moment they leave the oven: while the cups are still hot and pliable, you’ll gently press the center of each one to create that signature well. This is what transforms a cookie into a cup, and it’s incredibly satisfying to do. Allowing them to cool completely in the pan is essential for perfect, easy release. Then comes the final, most rewarding step: filling each cup with a generous dollop of Nutella. The contrast between the slightly crisp, buttery cookie and the smooth, creamy filling is pure magic. This entire process is a perfect example of how easy dessert ideas can lead to spectacular results.
My Best Tips for Perfect Cookie Cups Every Time
Through many batches of these cookie cups, I’ve gathered a few key tips to guarantee your success. First and foremost: grease your muffin pan very well. This is non-negotiable for easy removal. Second, do not rush the cooling process. Letting them cool completely in the pan allows them to firm up so they release cleanly without breaking. Third, when creating the well, press gently but firmly while the cookies are piping hot. If you wait too long, they’ll start to set and may crack. Finally, watch your bake time closely. You want the edges to be a lovely golden brown, but the centers can still look a tad soft—they will continue to set as they cool. Follow these simple guidelines, and you’re guaranteed a perfect batch of these charming treats.
Beyond Nutella: Endless Filling Ideas for Your Easy Desserts
While Nutella is our classic and beloved filling, one of the greatest things about these cookie cups is their versatility. They are a blank canvas for your favorite flavors and a fantastic way to use up partial jars in your pantry. For a protein-packed twist, fill them with creamy peanut butter—the salty-sweet combination is divine. A dollop of your favorite strawberry or raspberry jam adds a bright, fruity contrast. For something truly decadent, try a spoonful of salted caramel or a rich chocolate ganache. You can even get creative with cookie butter for a spiced, graham-cracker-like flavor. No matter what you choose, these little cups are the perfect vehicle for all your favorite easy desserts fillings. Top them with a sprinkle of flaky sea salt, some chopped nuts, or colorful sprinkles to match any holiday or celebration.
How to Store and Freeze Your Cookie Creations
These cookie cups are wonderfully keeper-friendly, which makes them ideal for preparing ahead of time. Store the filled cups in an airtight container at room temperature, and they’ll stay perfectly fresh and delicious for up to 5 to 6 days. If you need to stack them, simply place a sheet of parchment paper between the layers to protect the filling. For longer-term storage, I highly recommend freezing the unfilled cups. Place the completely cooled, unfilled cups in a single layer in a freezer-safe container or bag, separating layers with parchment paper. They can be frozen for up to 3 months. When you’re ready to enjoy them, simply let them thaw at room temperature, then fill them with Nutella or your chosen spread. This makes them an excellent make-ahead option for parties, holidays, or whenever a craving for easy dessert recipes strikes.
Frequently Asked Questions
Why did my cookie cups stick to the pan?
This is the most common question, and the answer is almost always that they were removed from the pan too soon. It’s crucial to let them cool completely in the pan. As they cool, they firm up and naturally pull away from the sides, making them much easier to release. A final run around the edges with a thin knife and a gentle twist should do the trick.
Can I use a mini muffin pan instead?
Absolutely! Mini cookie cups would be adorable for parties. Just keep a close eye on them as they will bake faster. Start checking for doneness around the 8-10 minute mark. You’ll likely get many more cups from this batch.
My cookie cups spread too much and lost their shape. What happened?
This can happen if the butter was too warm or melted. Ensure your melted butter is only slightly warm, not hot, before mixing it with the sugars. Also, be sure to measure your flour correctly by spooning it into your measuring cup and leveling it off, rather than scooping directly from the bag, which can pack in too much flour or too little.
Can I make the dough ahead of time?
While this recipe is designed to be baked immediately, you can make the dough, cover it tightly, and refrigerate it for up to 24 hours. You may need to add a minute or two to the baking time if baking from chilled.
Notes & Tips for Baking Success
- Measure Flour Correctly: For the best texture, spoon the flour into your measuring cup and level it off with a knife. Scooping directly can compact the flour, leading to dry cookies.
- Room Temperature Egg: Using a room-temperature egg helps it emulsify into the melted butter smoothly, creating a more uniform dough. If you forget to take it out of the fridge, place it in a bowl of warm water for 5 minutes.
- Don’t Overmix: Once you add the dry ingredients to the wet, mix only until no streaks of flour remain. Overmixing can develop the gluten and result in tougher cookies.
- Make Them Your Own: This recipe is a fantastic base. Try adding a pinch of cinnamon to the dough, using milk chocolate or dark chocolate chips, or drizzling the finished cups with melted white chocolate for an extra-special touch.
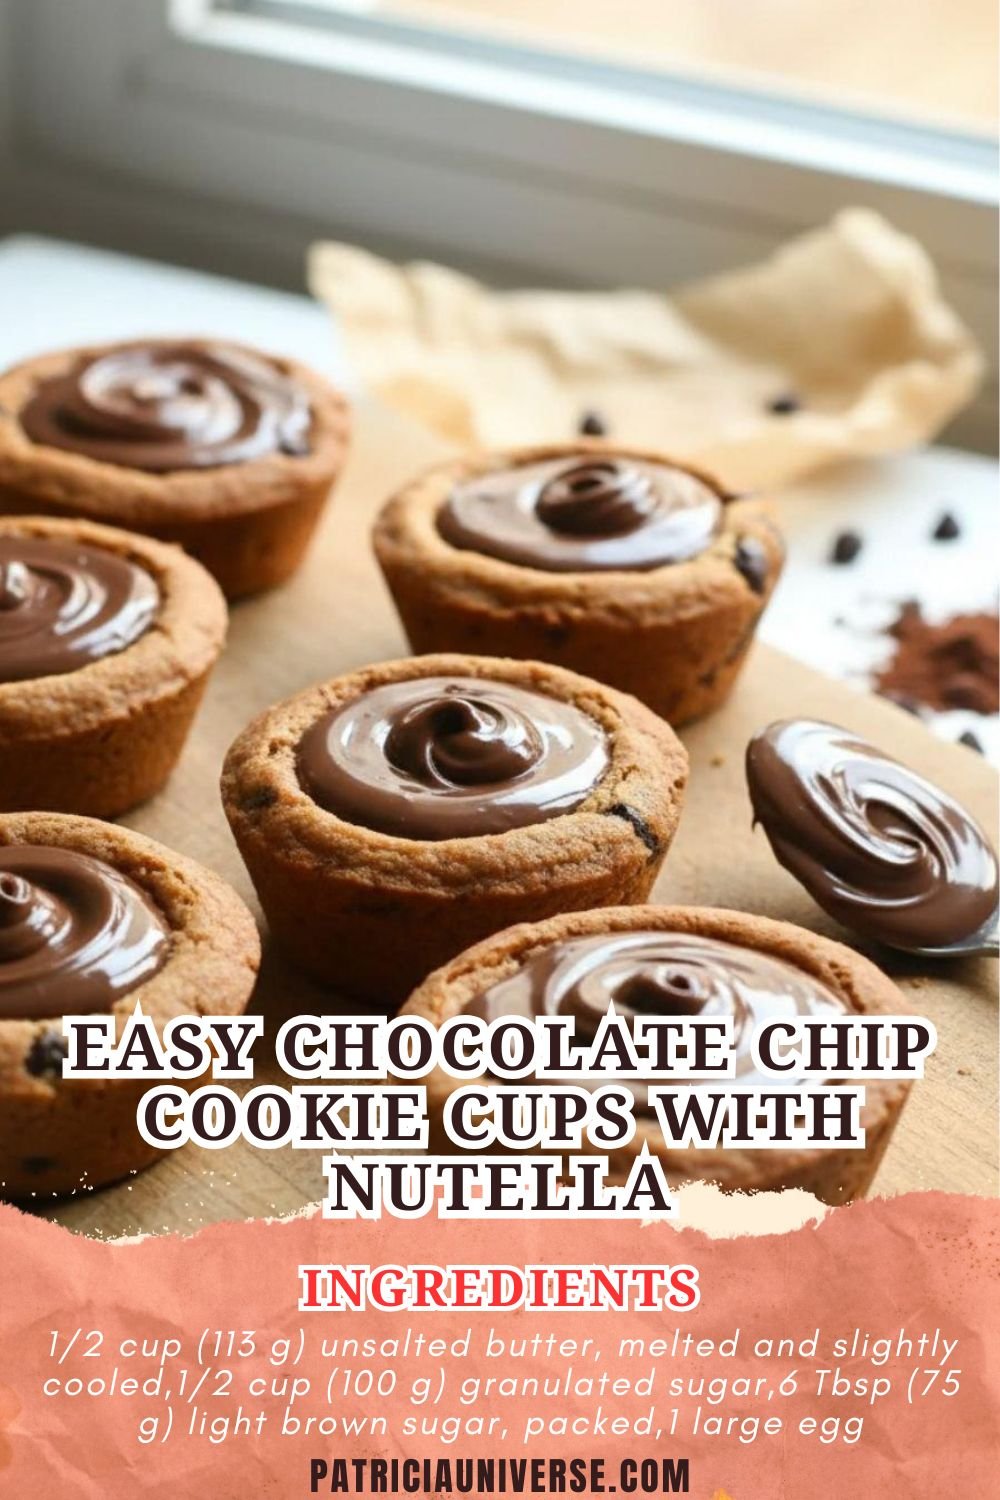
Easy Chocolate Chip Cookie Cups with Nutella
Ingredients
- 1/2 cup (113 g) unsalted butter, melted and slightly cooled
- 1/2 cup (100 g) granulated sugar
- 6 Tbsp (75 g) light brown sugar, packed
- 1 large egg, at room temperature
- 1 tsp vanilla extract
- 1 ½ cups (196 g) all-purpose flour
- 1 tsp cornstarch
- ½ tsp baking soda
- ¼ tsp salt
- 6 Tbsp (65 g) mini chocolate chips
- About 1 heaping cup (300 g) Nutella, for filling
Instructions
- Preheat your oven to 350°F (175°C). Grease a standard 12-cup muffin tin thoroughly with baking spray. Set aside.
- In a large bowl, whisk together the melted butter, granulated sugar, and brown sugar until well combined. Add the egg and vanilla extract, and whisk until the mixture is smooth.
- In a separate small bowl, whisk together the flour, cornstarch, baking soda, and salt. Add the dry ingredients to the wet ingredients and stir with a spatula just until combined. Be sure to scrape the bottom of the bowl. Fold in the mini chocolate chips.
- Drop a rounded tablespoon of dough (about 40 grams) into each muffin cup. Gently press the dough down with the back of a spoon to flatten it slightly.
- Bake for 12 to 15 minutes, or until the edges are lightly golden. The centers will still look slightly soft.
- Immediately after removing the pan from the oven, use the back of a tablespoon or a small measuring spoon (like a 1/8 cup) to gently press down the center of each cookie cup, creating a well for the filling.
- Let the cookie cups cool completely in the muffin pan. This is crucial for them to set properly and release easily.
- Once completely cool, run a thin knife around the edges of each cup, give them a gentle twist to loosen, and lift them out of the pan.
- Spoon or pipe your desired amount of Nutella into the center of each cookie cup. Serve immediately or store as directed.


Leave a Comment