Welcome to Patricia Universe! I’m Patricia, and I believe that creating show-stopping desserts should be an easy and joyful experience. This Triple Chocolate Mousse Cake is a perfect example—it looks incredibly elegant yet is surprisingly simple to put together. If you’re looking for a simple dessert that delivers maximum decadence with minimal fuss, you’ve found it. Let’s walk through why this cake is a guaranteed crowd-pleaser and how you can master it with confidence.
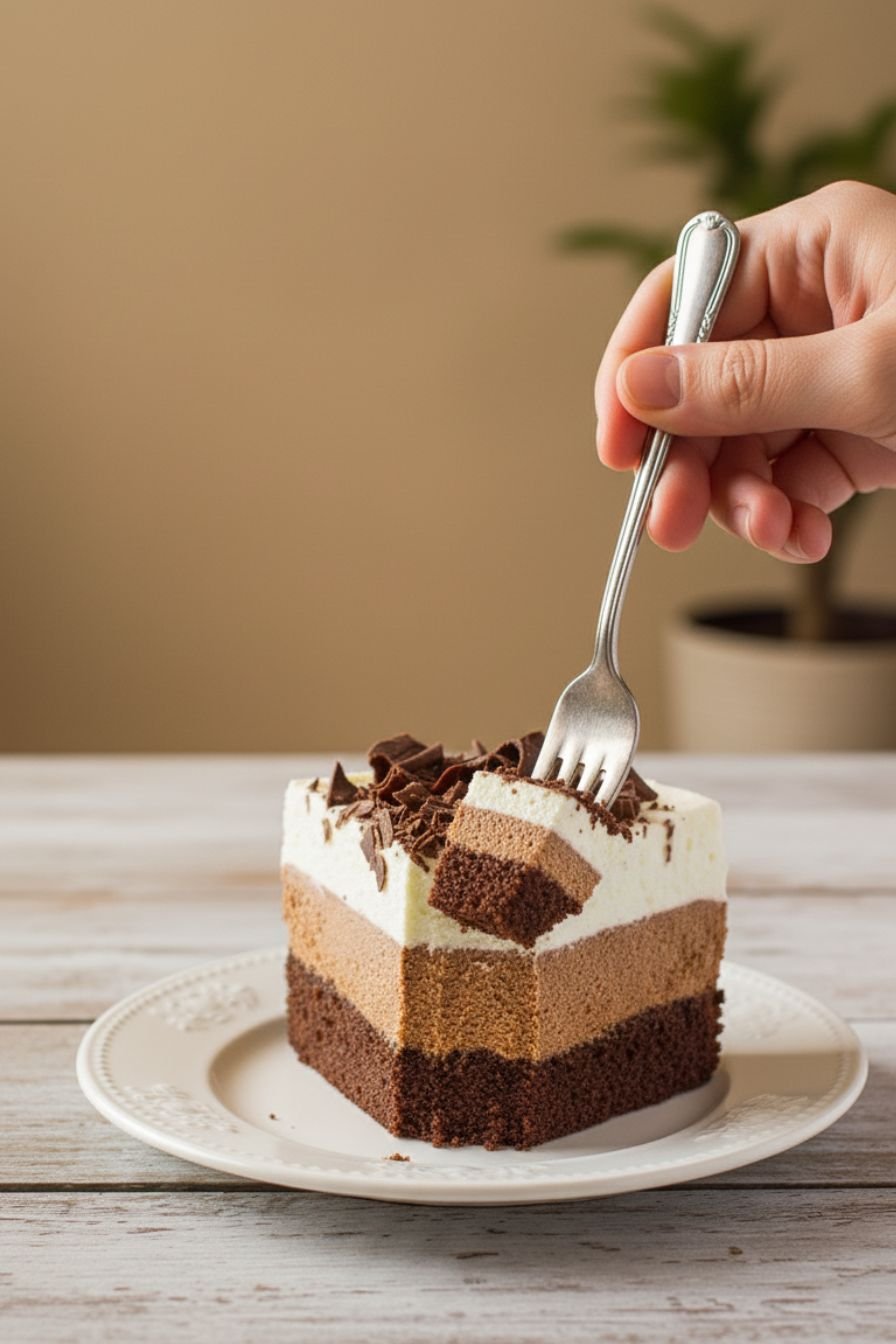
Table of Contents
- Why This Cake Is a Must-Try
- The Secret to Its Easy Elegance
- Perfect for Any Occasion
- How to Achieve Perfect Layers Every Time
- Make-Ahead Magic
- Final Thoughts from My Kitchen
- The Recipe: Triple Chocolate Mousse Cake
- Notes & Tips
Key Takeaways
- Impressive Yet Approachable: This cake features three distinct chocolate layers but uses straightforward, no-fuss techniques.
- Ideal for Planning: It can be made entirely a day ahead, making it perfect for stress-free entertaining.
- Crowd-Pleasing Flavor: The combination of fudgy brownie, airy mousse, and rich ganache appeals to all chocolate lovers.
- Pro Tips Included: Follow the chilling times and slicing advice for bakery-perfect results every time.
Why This Cake Is a Must-Try
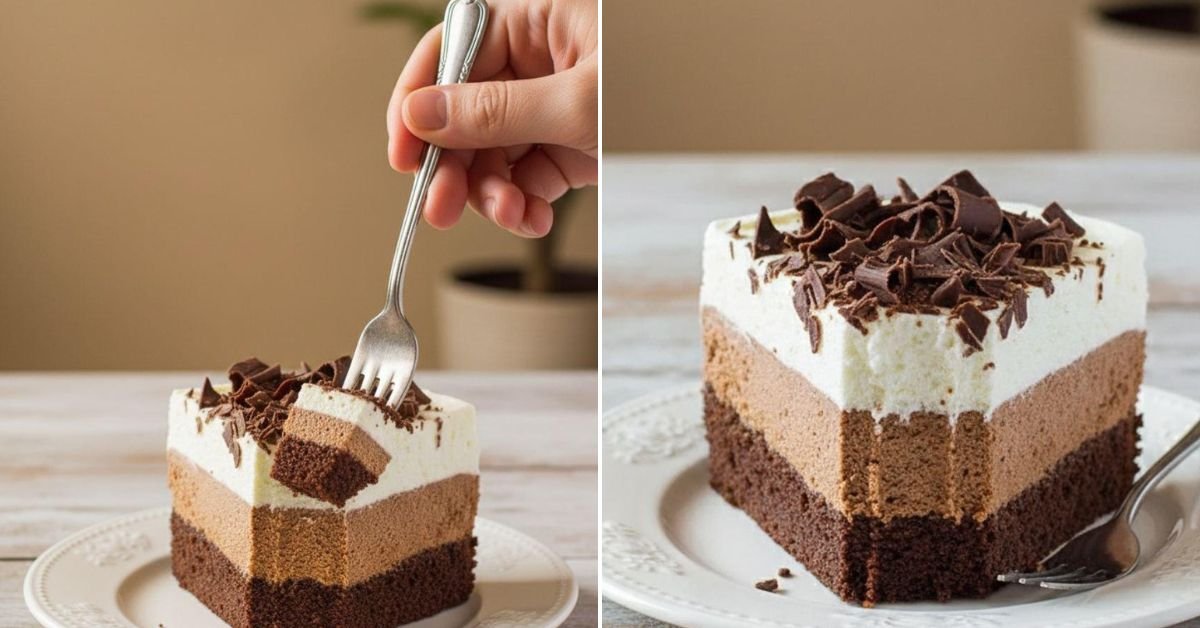
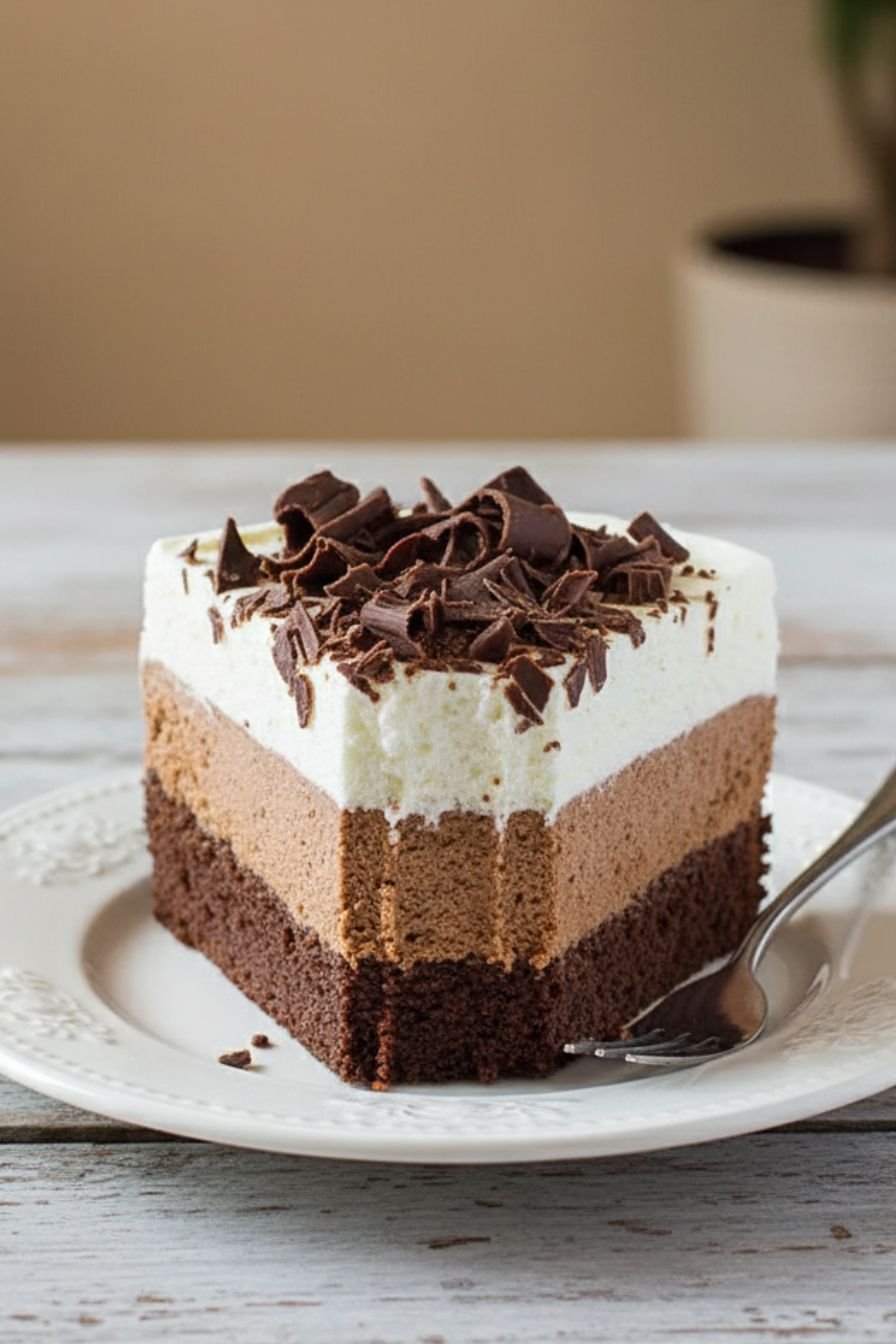
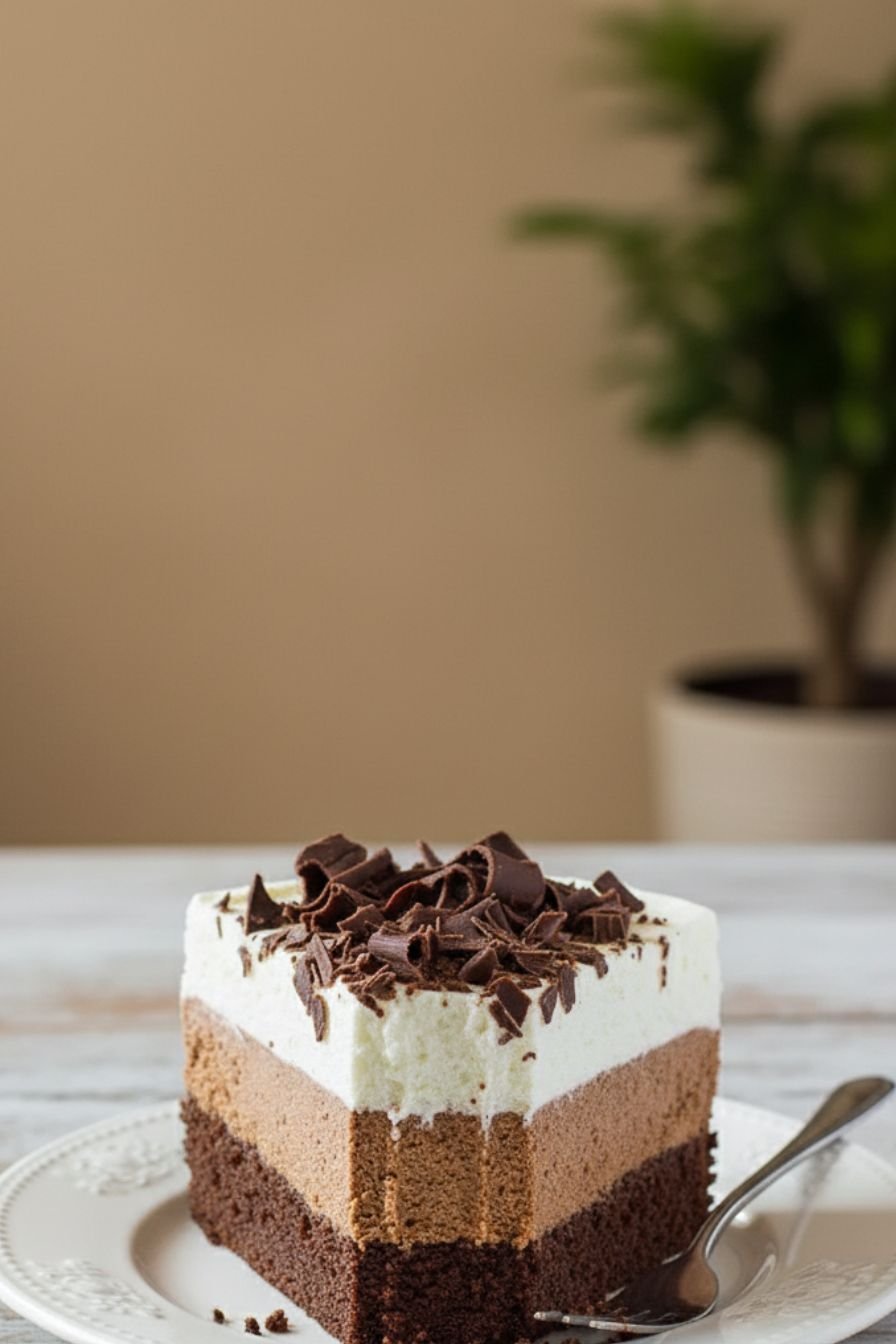
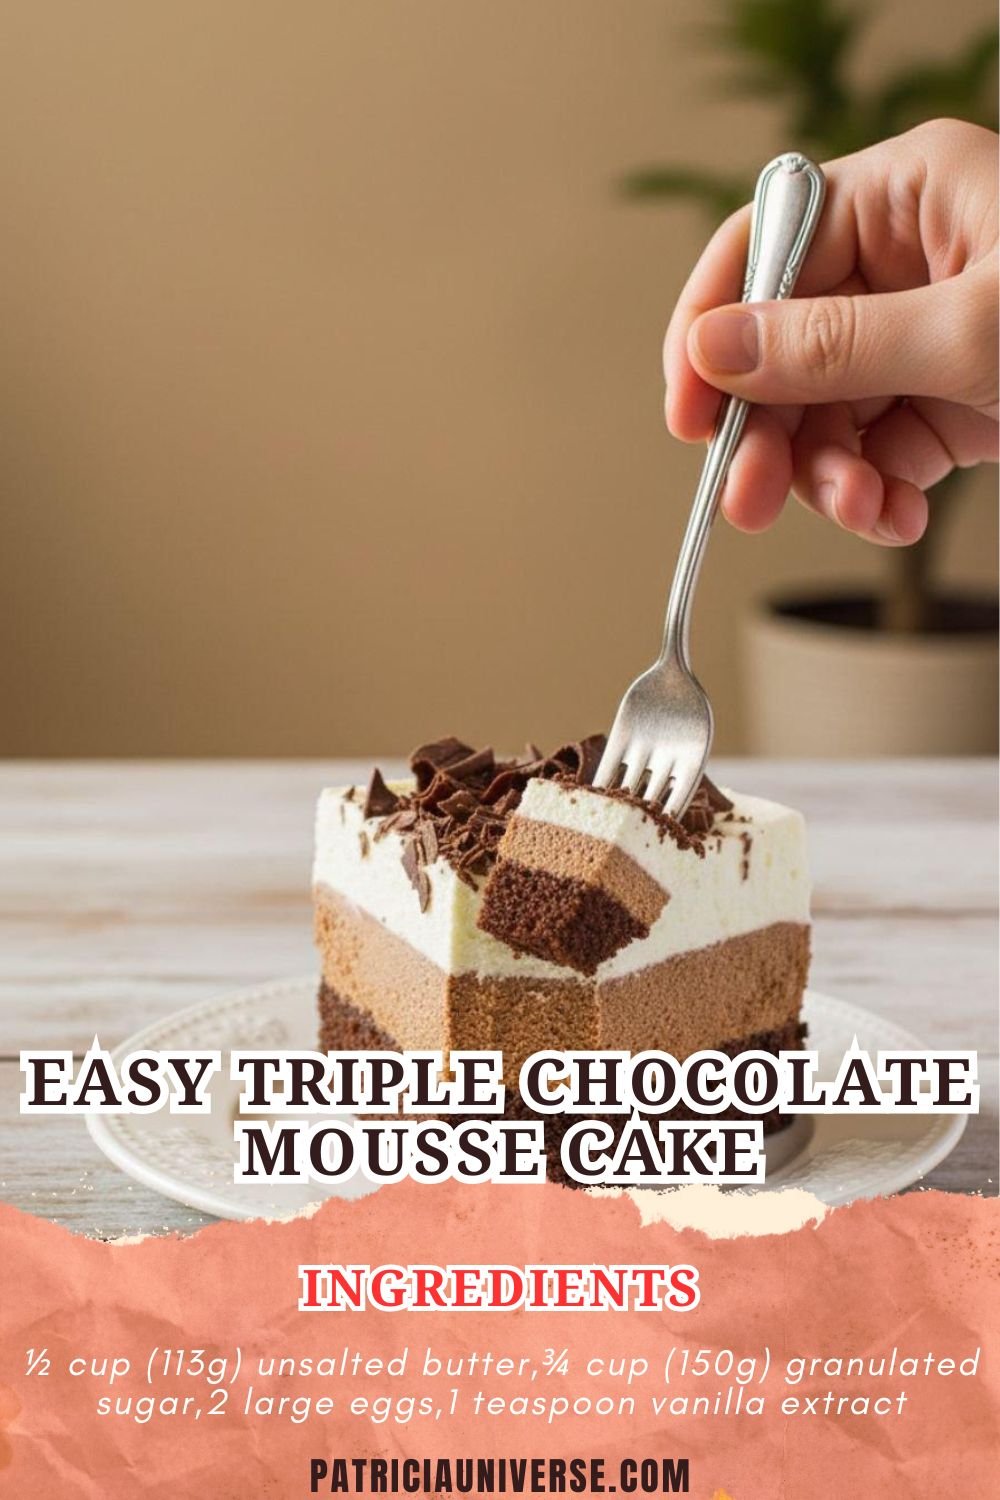
There’s something magical about a dessert that looks like it came from a professional patisserie but was crafted in your own kitchen. This triple chocolate mousse cake delivers exactly that. Each layer—dense brownie, cloud-like mousse, glossy ganache—offers a different texture and intensity of chocolate, creating a symphony in every bite. It’s the ultimate easy dessert recipe for when you want to impress without the stress.
The Secret to Its Easy Elegance
The beauty of this simple dessert lies in its construction. Instead of complex baking methods, we rely on smart, effortless cooking techniques: a one-bowl brownie base, a mousse that comes together with a fold of whipped cream, and a ganache that simply requires pouring. There are no temperamental elements or advanced skills needed. This approach makes it one of the best quick and easy recipes for a sophisticated treat.

Perfect for Any Occasion
Whether it’s a birthday, anniversary, holiday dinner, or just a well-deserved weekend treat, this cake fits the bill. Its elegant appearance makes it special, while its make-ahead nature removes last-minute panic. Serving a slice of this decadent chocolate dessert is always a memorable moment. It’s a fantastic addition to your repertoire of quick and easy dinner recipes that end on a sweet, spectacular note.
How to Achieve Perfect Layers Every Time
The key to this cake’s stunning look is allowing each layer to set properly before adding the next. Patience is your best friend here! Let the brownie base cool completely, chill the mousse until firm, and allow the ganache to thicken slightly before pouring. For clean, professional slices, dip your knife in hot water and wipe it dry between each cut. This simple trick ensures those beautiful layers stay distinct on the plate.
Make-Ahead Magic
One of the greatest advantages of this easy recipe is that it actually gets better with time. You can assemble the entire cake a full day before you need it. Just cover it and let it rest in the refrigerator. This not only deepens the flavors but also gives you one less thing to worry about when guests arrive. It’s the ultimate simple strategy for effortless entertaining.
Final Thoughts from My Kitchen
I created this recipe for Patricia Universe to share the joy of uncomplicated baking. This Triple Chocolate Mousse Cake proves that you don’t need complicated steps to create something extraordinary. It’s a testament to how a few quality ingredients and straightforward methods can yield breathtaking results. I hope it brings as much delight to your table as it does to mine.

Irresistible Triple Chocolate Mousse Cake
Ingredients
For the Brownie Base
- ½ cup (113g) unsalted butter
- ¾ cup (150g) granulated sugar
- 2 large eggs
- 1 teaspoon vanilla extract
- ⅓ cup (40g) all-purpose flour
- ⅓ cup (40g) unsweetened cocoa powder
- ¼ teaspoon salt
For the Chocolate Mousse
- 8 ounces (227g) semisweet chocolate, finely chopped
- 1 ½ cups (360ml) heavy whipping cream, cold
- ¼ cup (50g) granulated sugar
For the Chocolate Ganache
- 4 ounces (113g) bittersweet chocolate, finely chopped
- ½ cup (120ml) heavy whipping cream
Instructions
For the Brownie Base
- Preheat oven to 350°F (175°C). Grease and line an 8-inch springform pan with parchment paper.
- In a microwave-safe bowl, melt the butter. Whisk in sugar until combined.
- Add eggs and vanilla extract, whisking until smooth.
- Sift in flour, cocoa powder, and salt. Fold until just combined.
- Spread batter evenly in the prepared pan. Bake for 18-22 minutes, or until a toothpick inserted comes out with moist crumbs.
- Let cool completely in the pan.
For the Chocolate Mousse
- Place the chopped semisweet chocolate in a heatproof bowl.
- In a saucepan, heat ½ cup (120ml) of the heavy cream until it just begins to simmer.
- Pour the hot cream over the chocolate. Let sit for 1 minute, then stir until smooth. Allow to cool to room temperature.
- In a separate bowl, whip the remaining 1 cup (240ml) of cold heavy cream with the sugar until stiff peaks form.
- Gently fold one-third of the whipped cream into the cooled chocolate mixture to lighten it.
- Fold in the remaining whipped cream until no white streaks remain.
- Spread the mousse evenly over the cooled brownie base. Chill for at least 2 hours, or until set.
For the Chocolate Ganache and Assembly
- Place the chopped bittersweet chocolate in a heatproof bowl.
- Heat the heavy cream in a saucepan until it simmers.
- Pour the hot cream over the chocolate. Let sit for 1 minute, then stir until smooth and glossy.
- Allow the ganache to cool for about 10 minutes, until slightly thickened but still pourable.
- Pour the ganache over the chilled mousse layer, tilting the pan to spread it evenly.
- Return the cake to the refrigerator for at least 1 hour, or until the ganache is set.
- To serve, carefully run a knife around the edge of the pan and release the springform. Slice with a hot knife for clean cuts.


Leave a Comment