Table of Contents
- Key Takeaways
- The Magic of No-Bake Desserts
- Why Espresso and Chocolate Make the Perfect Pair
- Tips for the Perfect No-Bake Cheesecake
- How to Customize Your Cheesecake
- Pairing Suggestions: Drinks and Toppings
- FAQs About No-Bake Cheesecakes
Key Takeaways
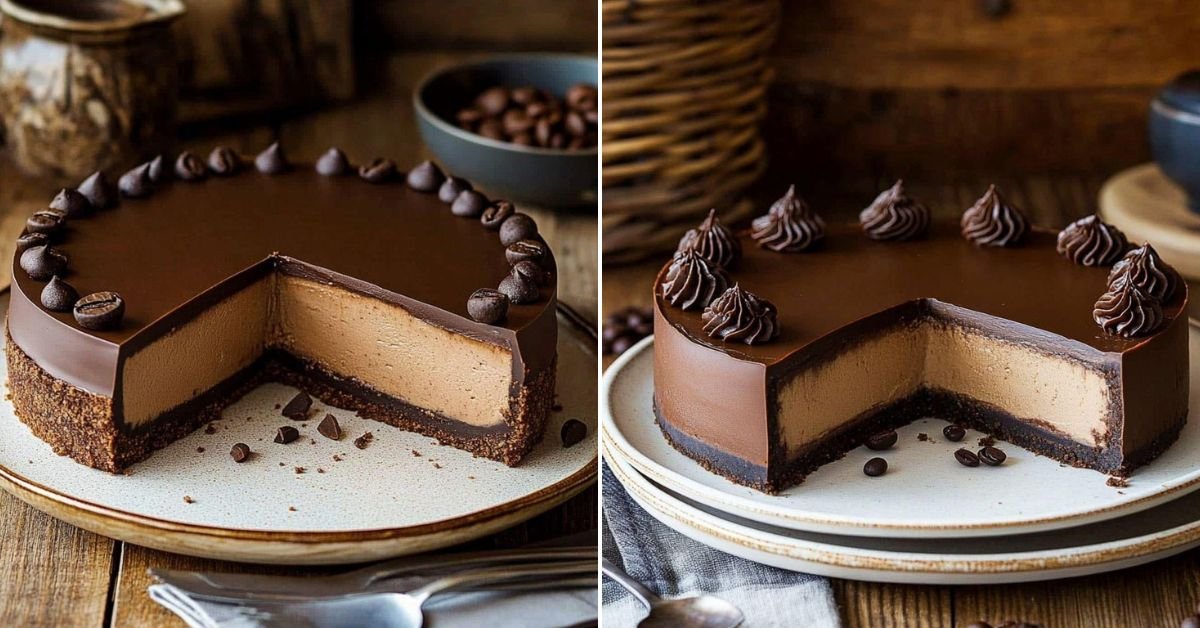
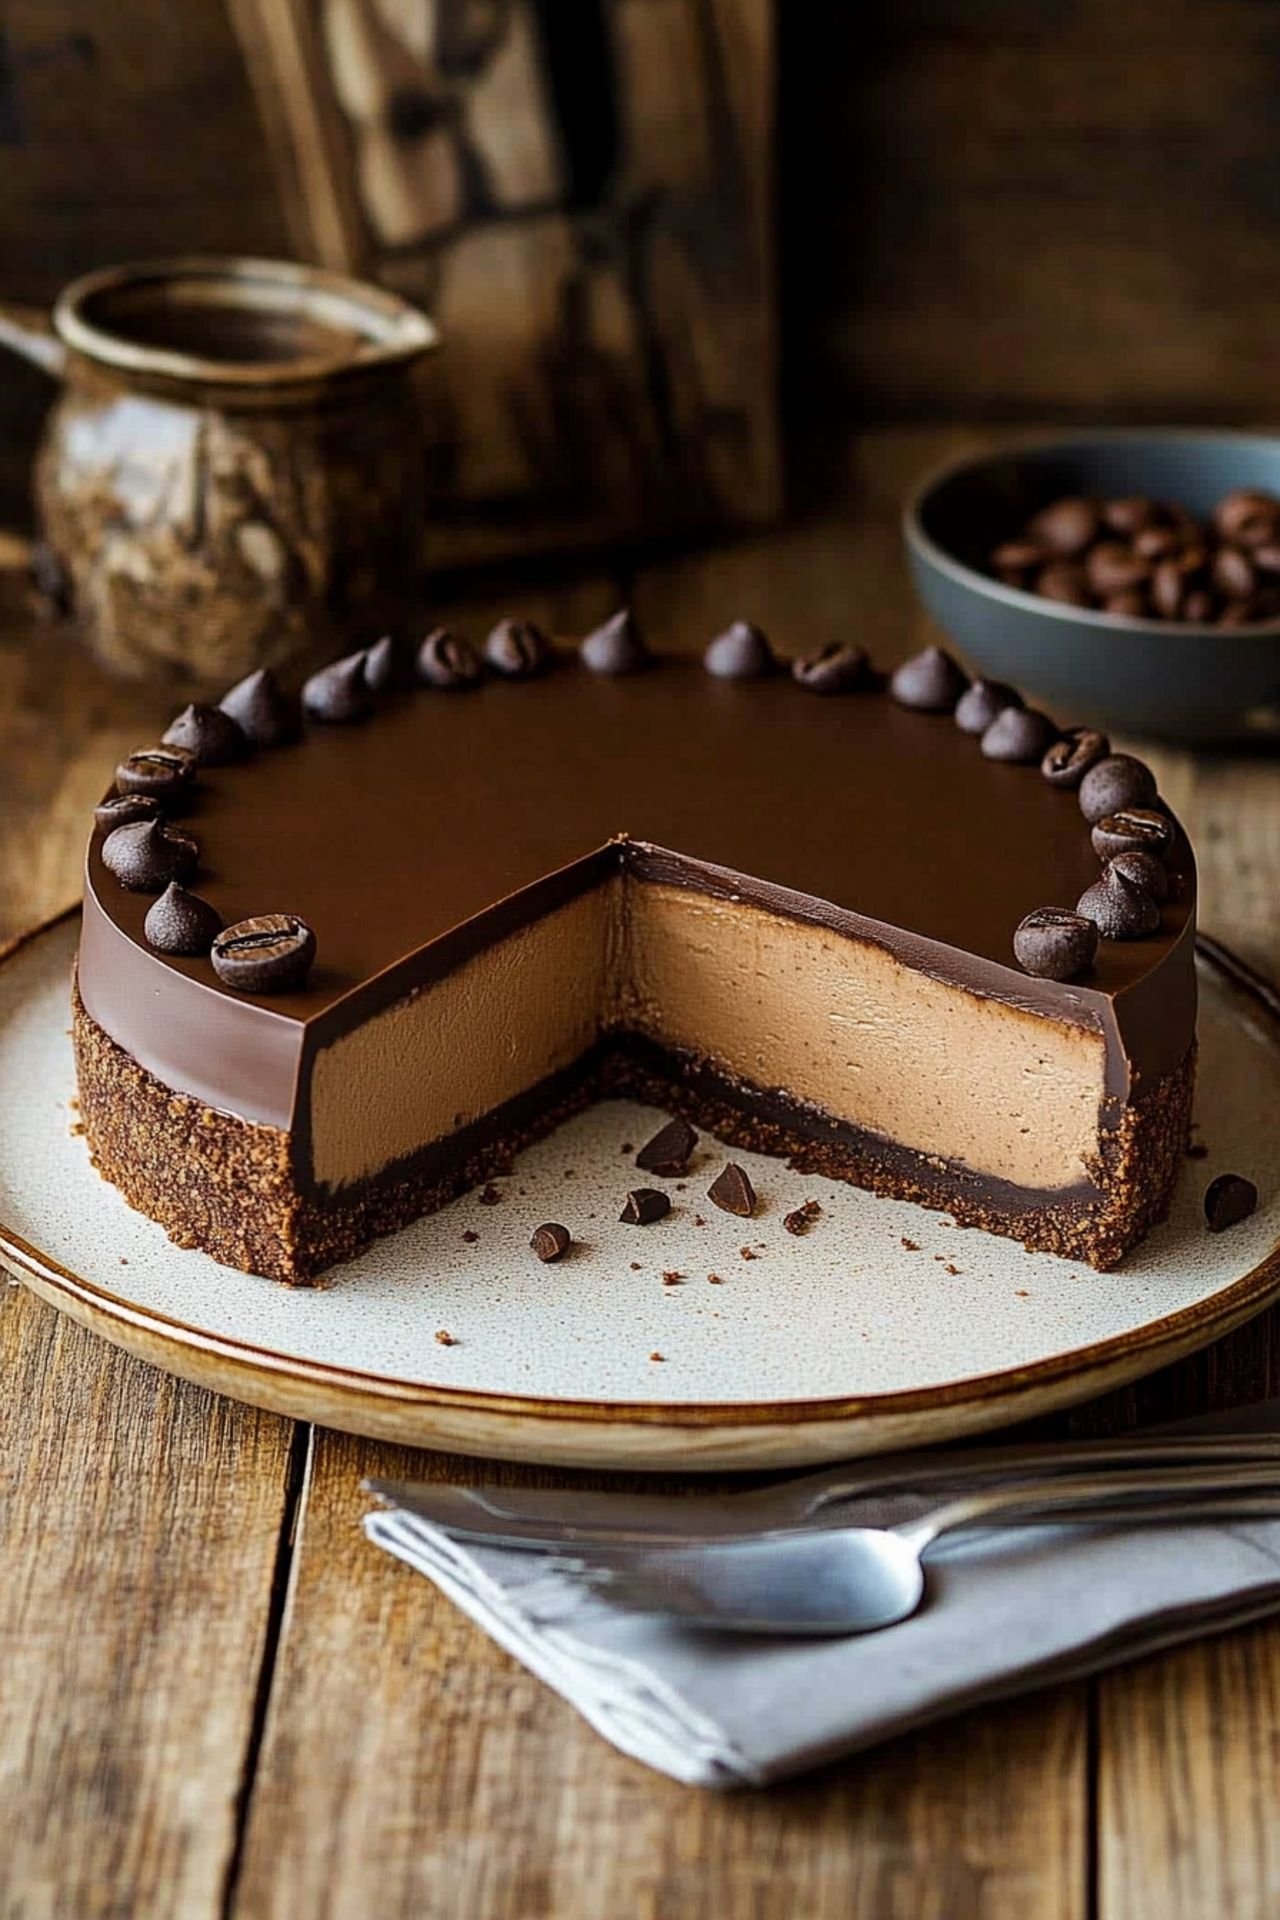
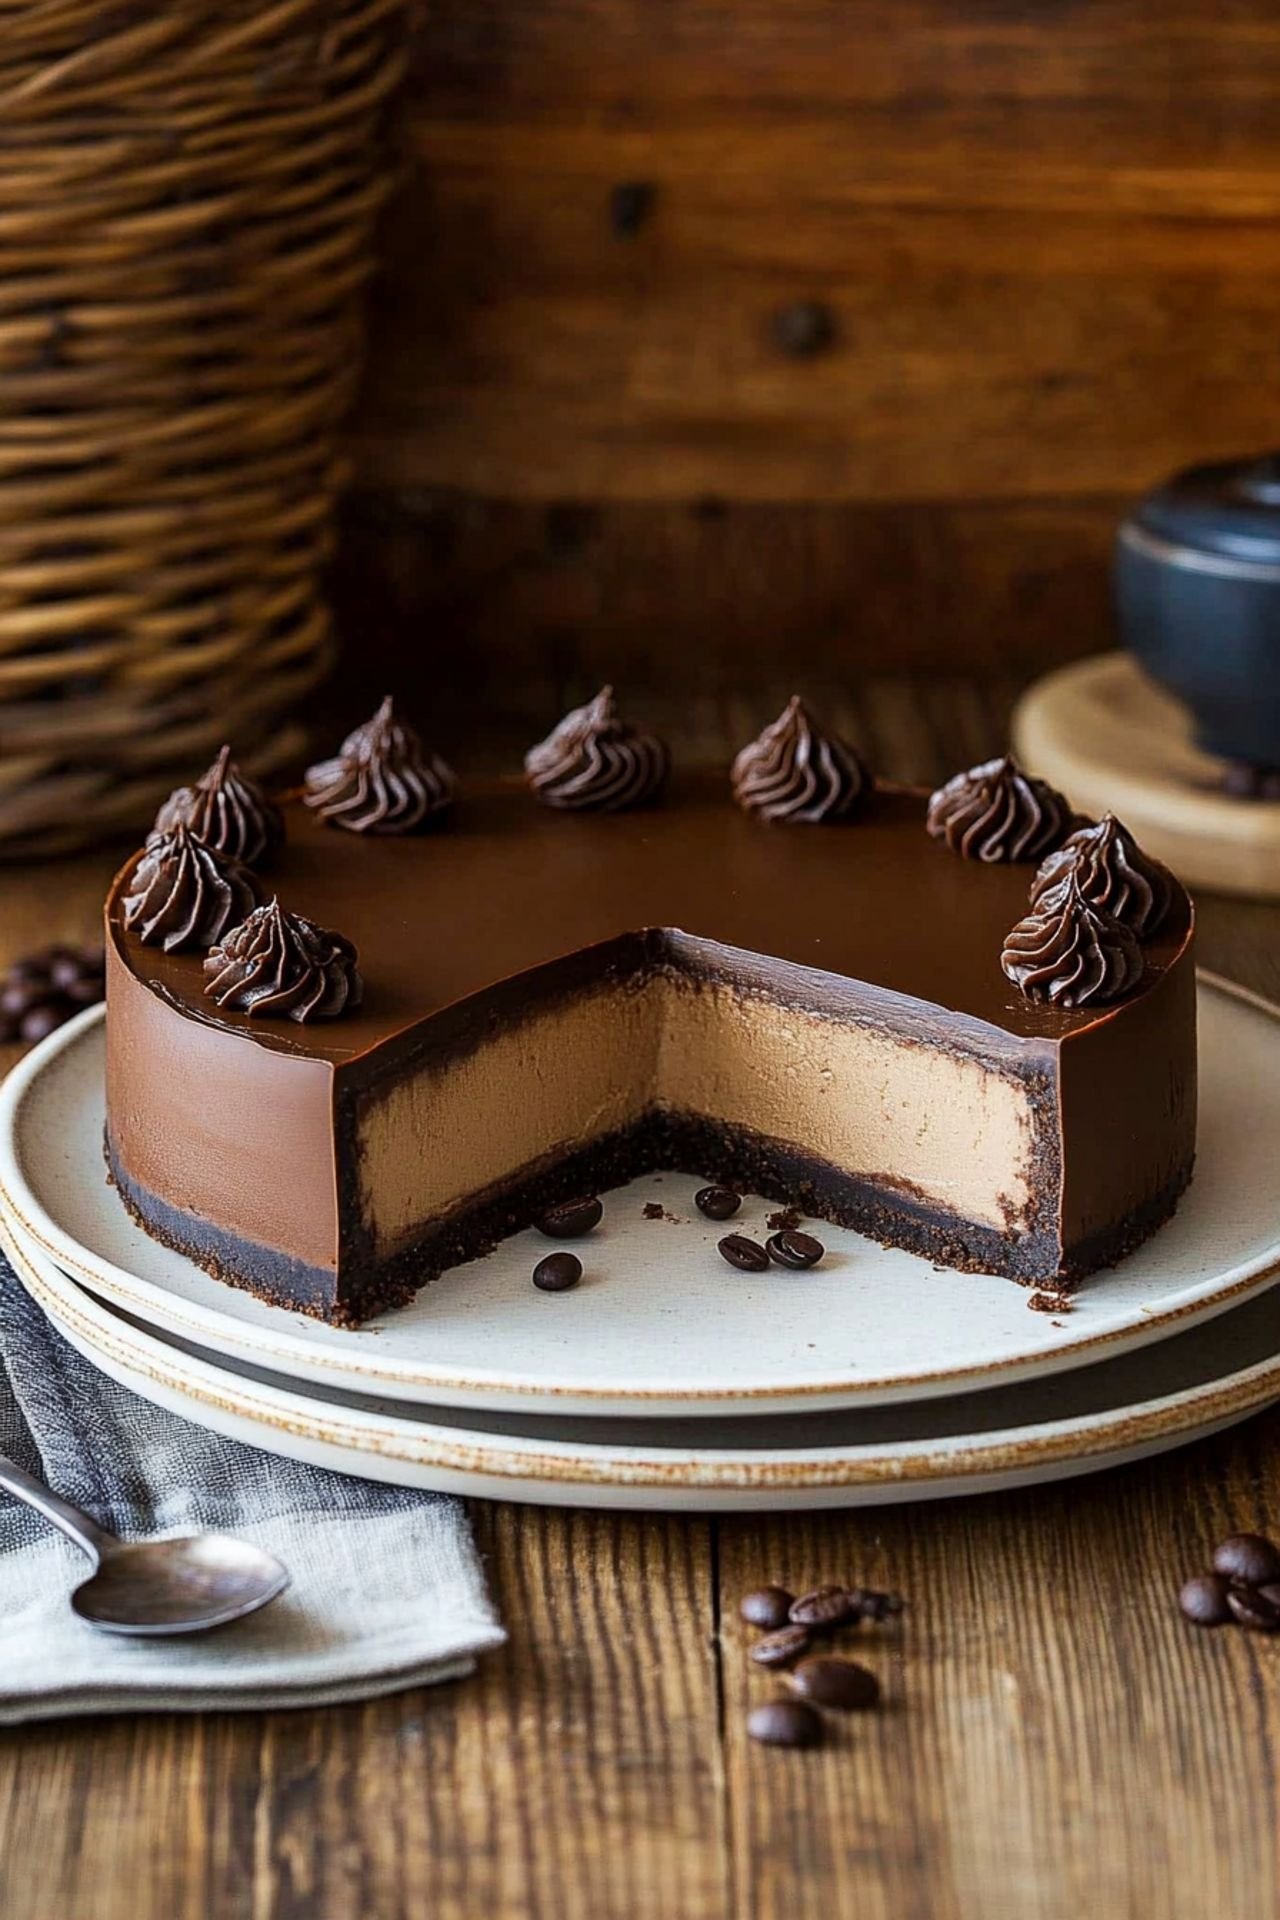
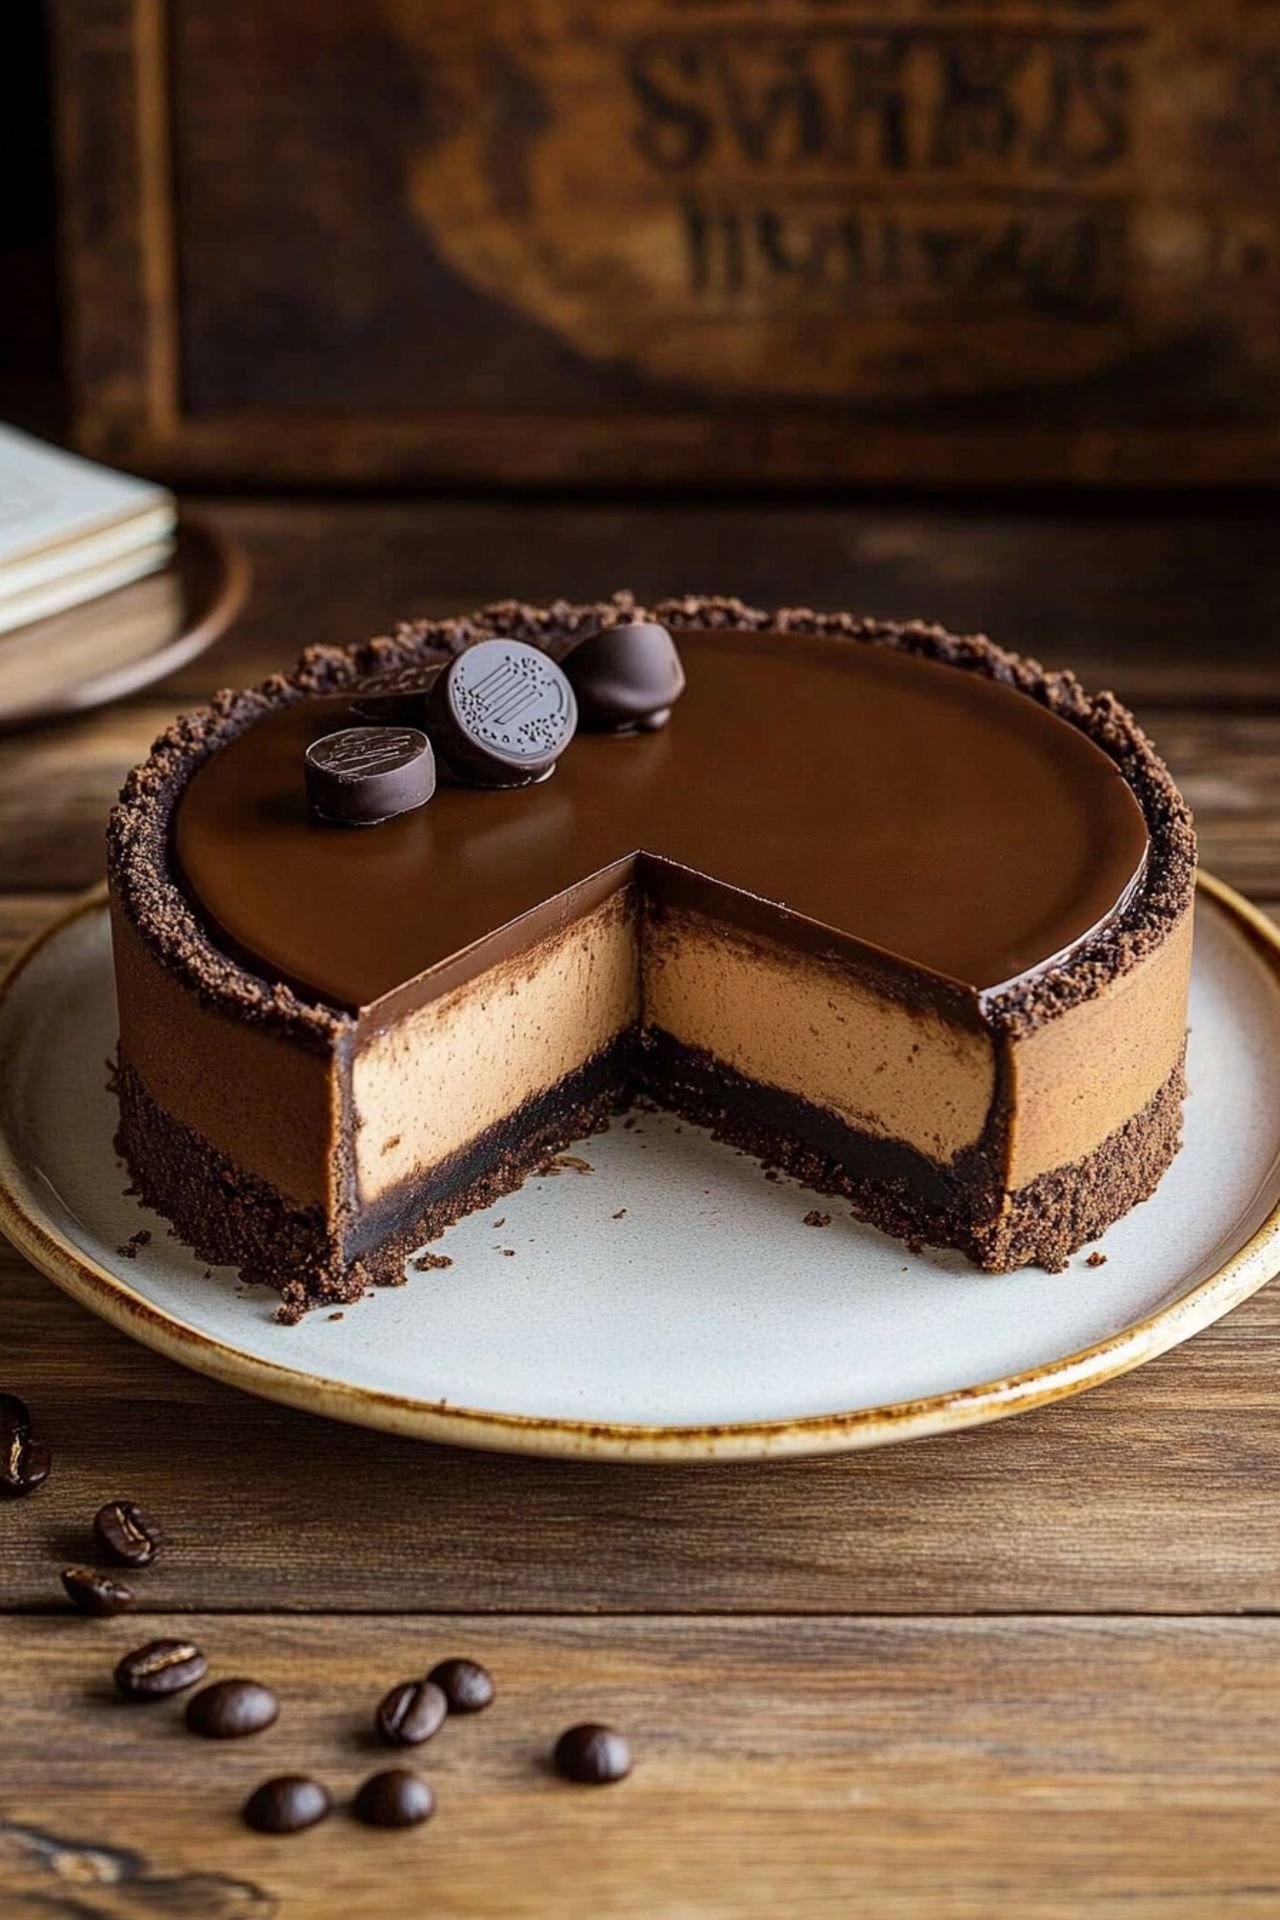
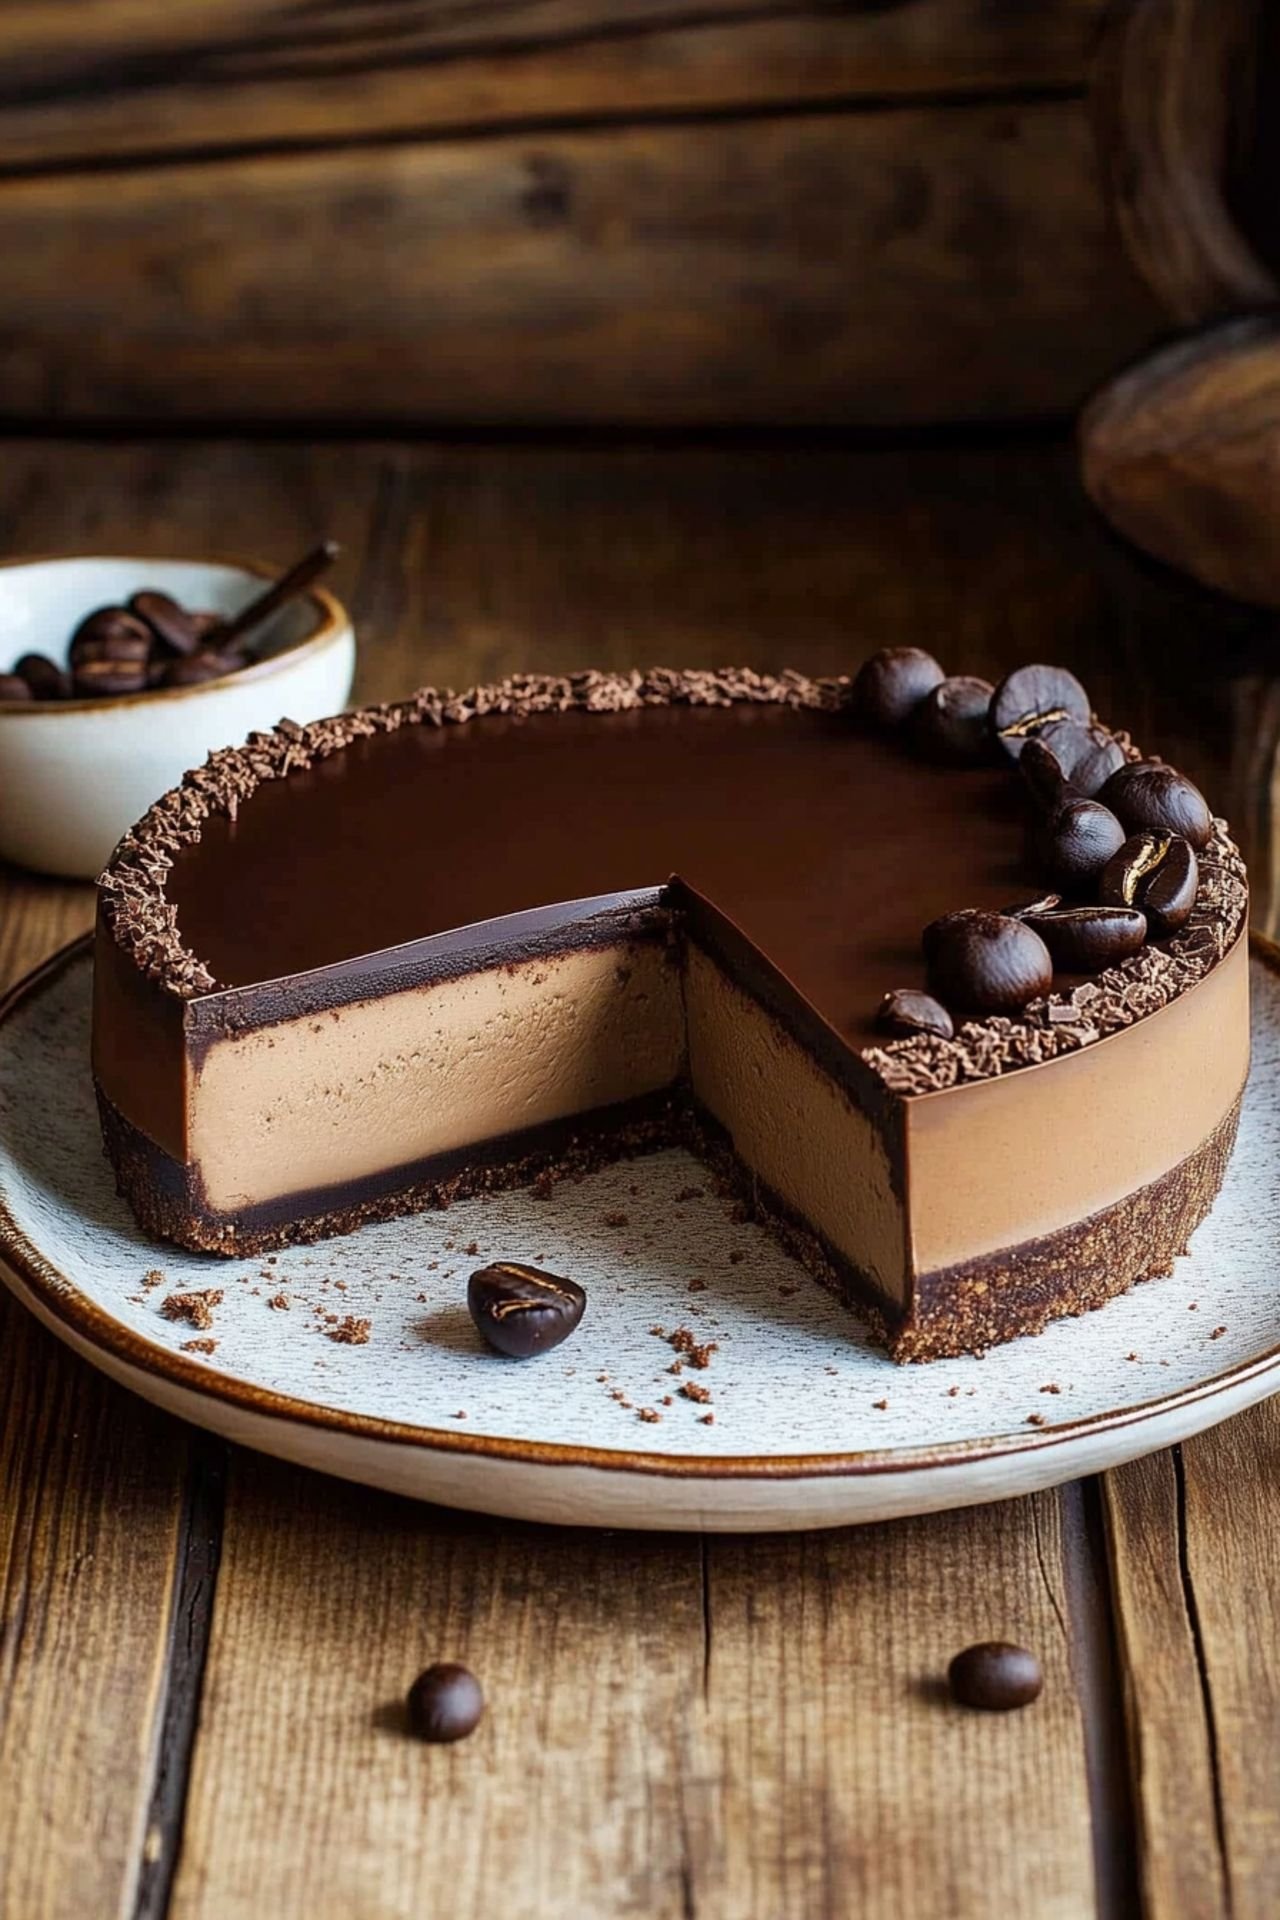
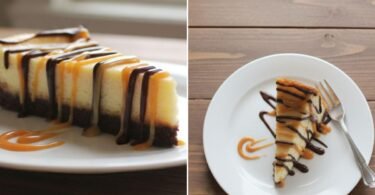
This No-Bake Espresso Chocolate Cheesecake is an effortless yet decadent dessert that combines bold coffee flavors with creamy chocolate indulgence. It’s easy to make, requires no oven time, and is perfect for coffee and chocolate lovers alike. With a rich and smooth texture, this cheesecake is ideal for gatherings, holidays, or whenever you crave a luxurious sweet treat.
The Magic of No-Bake Desserts
No-bake desserts are a lifesaver for busy bakers and those who want a stress-free yet delicious dessert. This No-Bake Espresso Chocolate Cheesecake from Patricia Universe is a prime example of how you can create a rich and flavorful treat without turning on the oven. With a few simple steps, you’ll have a luscious cheesecake that sets perfectly in the fridge.
Why Espresso and Chocolate Make the Perfect Pair
The combination of espresso and chocolate is a match made in dessert heaven. Espresso enhances the deep, rich flavor of chocolate, making it more intense and satisfying. This cheesecake balances these flavors perfectly, offering a sophisticated yet approachable treat. Whether you’re a coffee enthusiast or a chocoholic, this dessert will satisfy your cravings.
Tips for the Perfect No-Bake Cheesecake
Creating a flawless no-bake cheesecake requires a few expert tips. First, use high-quality cream cheese for the creamiest texture. Second, ensure the heavy cream is whipped to stiff peaks before folding it in, which helps the cheesecake maintain its structure. Lastly, let it chill for at least 4 hours, or overnight if possible, to achieve the perfect set and flavor development.
How to Customize Your Cheesecake
While this recipe is divine as is, there are plenty of ways to customize it. Add a layer of caramel sauce for extra indulgence, or top it with crushed cookies for added texture. You can also swap out the chocolate for white chocolate if you prefer a lighter flavor profile. The options are endless, making this a versatile dessert for any occasion.
Pairing Suggestions: Drinks and Toppings
This cheesecake pairs beautifully with a variety of drinks and toppings. A classic espresso or cappuccino enhances its rich coffee notes, while a glass of red wine adds a touch of sophistication. For toppings, consider fresh berries, whipped cream, or a drizzle of chocolate ganache for the ultimate indulgence.
FAQs About No-Bake Cheesecakes
Can I make this cheesecake ahead of time? Absolutely! This cheesecake is best when made at least a day in advance, giving it ample time to set and develop its flavors.
How should I store leftovers? Store in an airtight container in the refrigerator for up to 5 days. You can also freeze individual slices for up to 2 months.
Can I use decaf espresso powder? Yes! If you prefer a milder coffee flavor without the caffeine, decaf espresso powder works just as well.
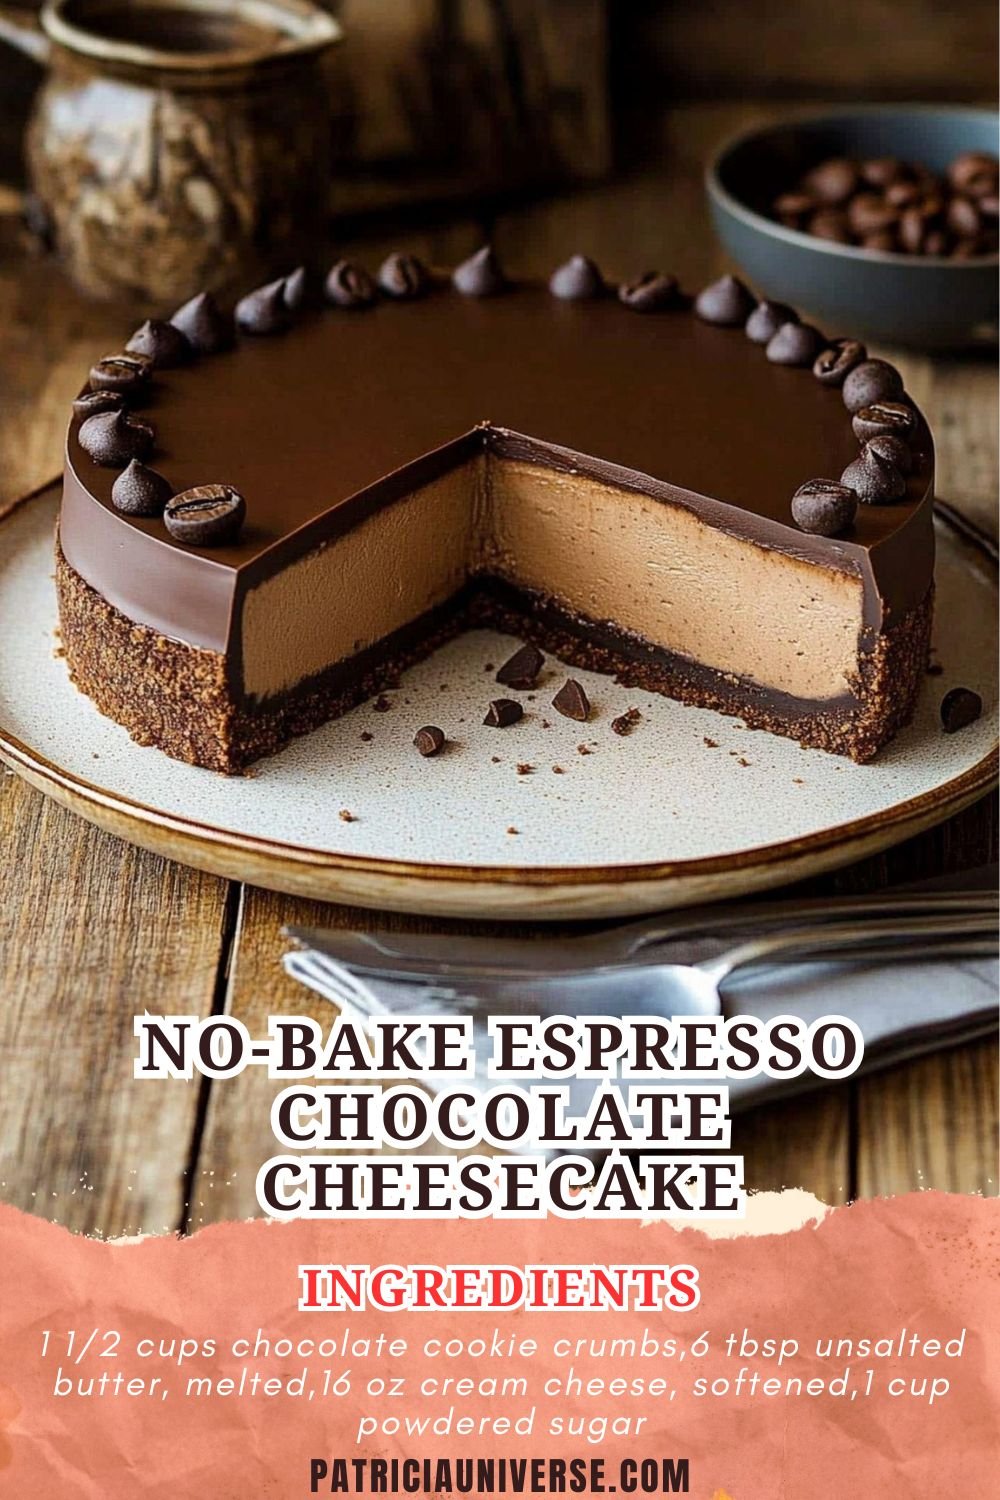
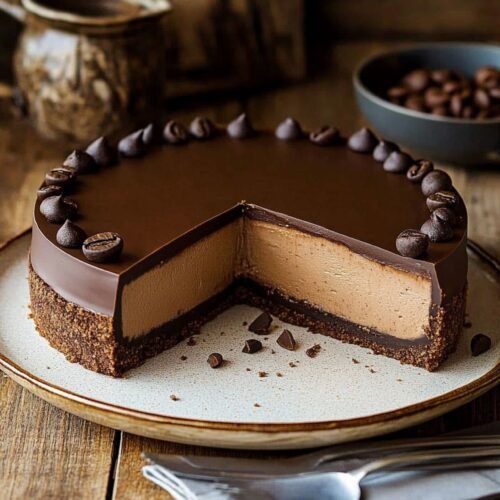
No-Bake Espresso Chocolate Cheesecake
Ingredients
- 1 1/2 cups chocolate cookie crumbs
- 6 tbsp unsalted butter, melted
- 16 oz cream cheese, softened
- 1 cup powdered sugar
- 1/2 cup unsweetened cocoa powder
- 1 tsp vanilla extract
- 1 tbsp instant espresso powder
- 1 1/2 cups heavy cream
- 6 oz dark chocolate, melted
- Chocolate shavings for garnish
Instructions
- In a bowl, mix chocolate cookie crumbs with melted butter. Press into the bottom of a springform pan and refrigerate.
- In a large mixing bowl, beat the cream cheese until smooth.
- Add powdered sugar, cocoa powder, vanilla extract, and espresso powder, mixing until well combined.
- In a separate bowl, whip the heavy cream until stiff peaks form.
- Gently fold the whipped cream into the cream cheese mixture.
- Stir in the melted dark chocolate until fully incorporated.
- Pour the mixture over the prepared crust, smoothing the top.
- Refrigerate for at least 4 hours or overnight.
- Garnish with chocolate shavings before serving.


Leave a Comment