Table of Contents
- Key Takeaways
- My Journey to a Perfect Dessert
- Why This Easy Cheesecake is a Game-Changer
- The Secret to a Foolproof No-Bake Cheesecake
- How to Customize Your Own Creation
- The Perfect Occasion for Easy Elegance
- A Note on Ingredients and Tools
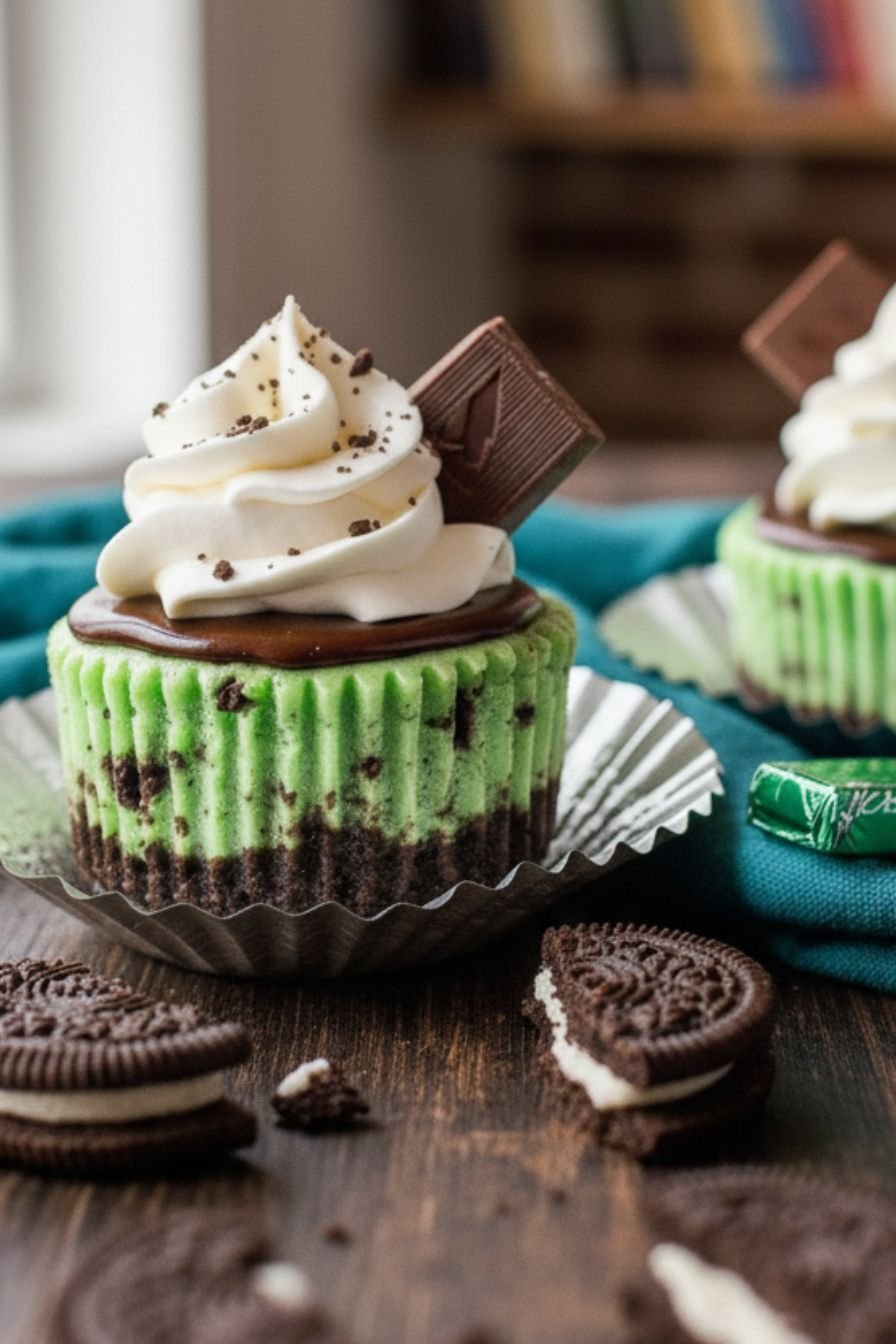
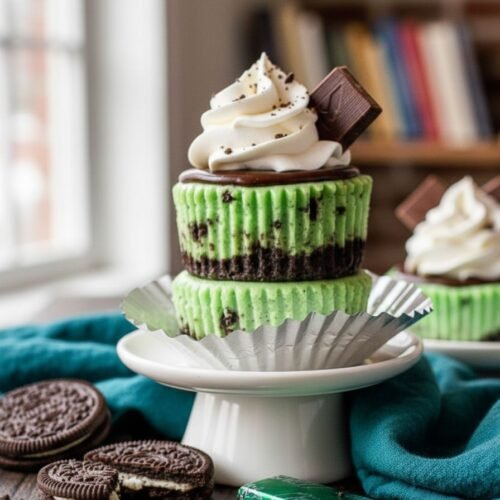
- The Full Mint Chocolate Cheesecake Recipe
- Notes & Tips for Success
Key Takeaways
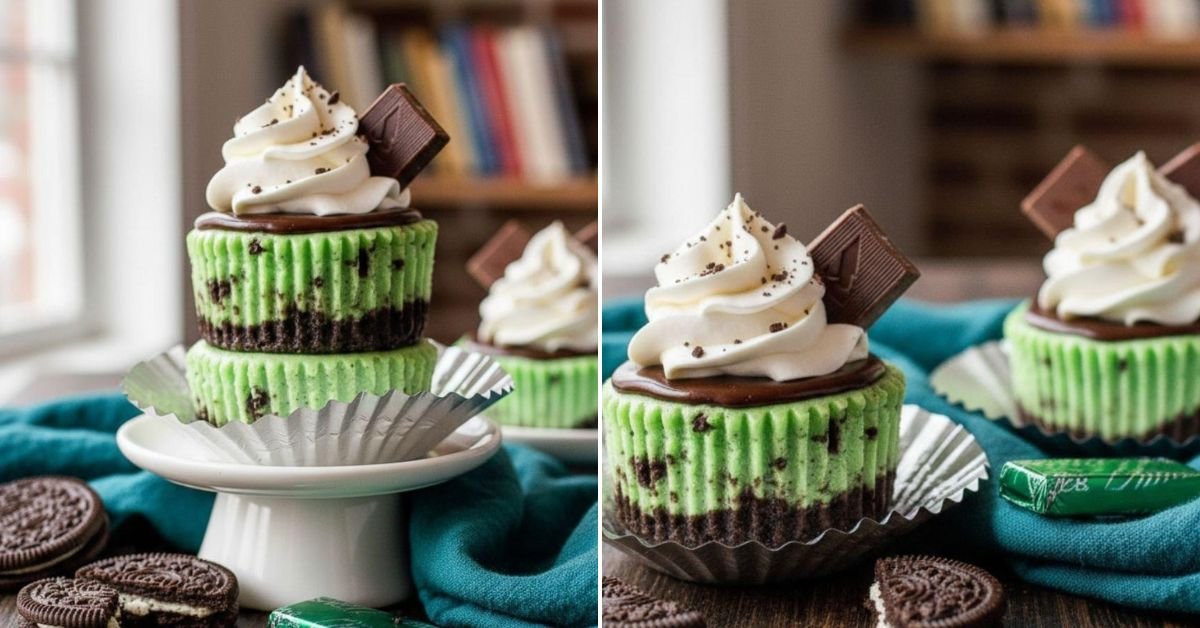
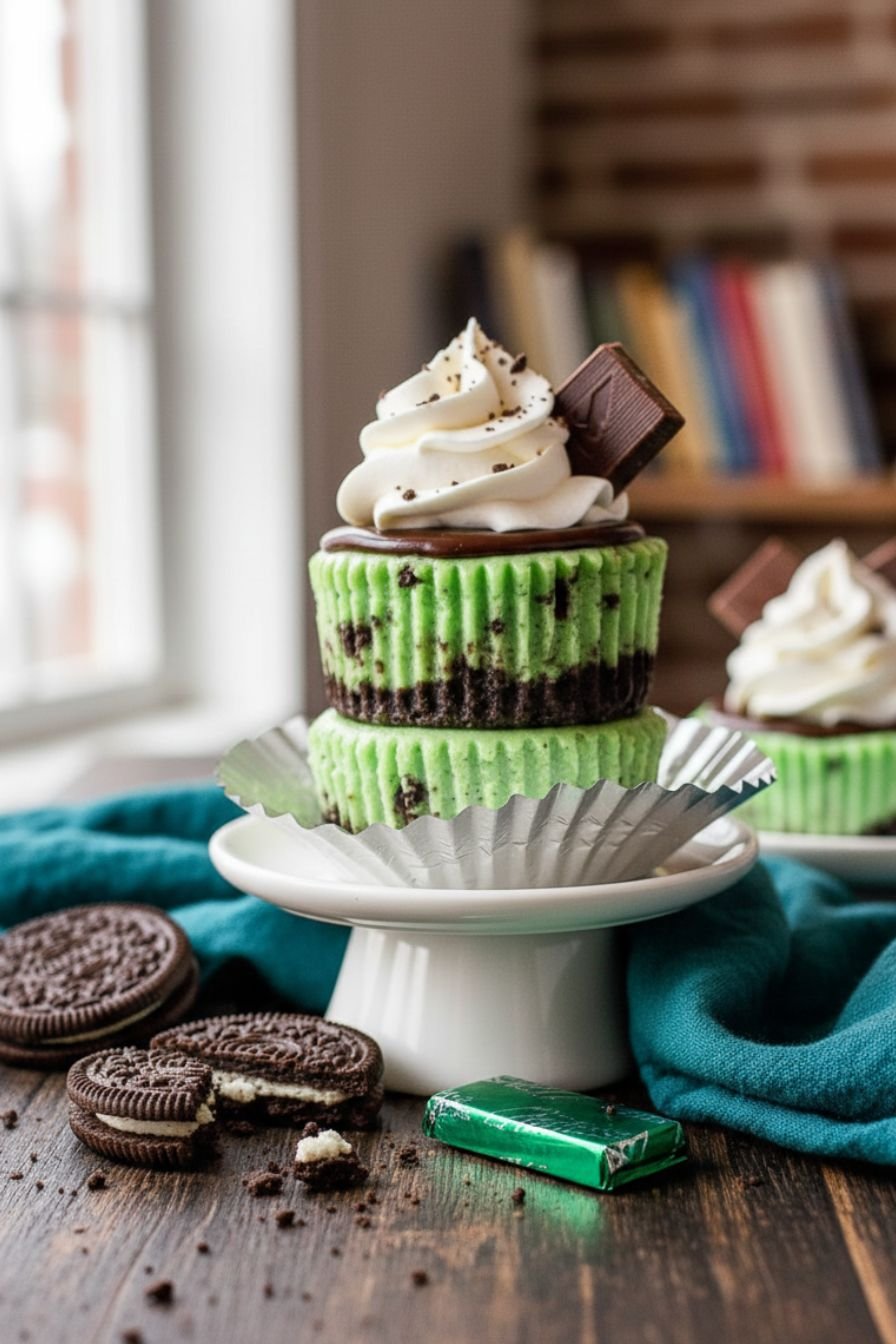
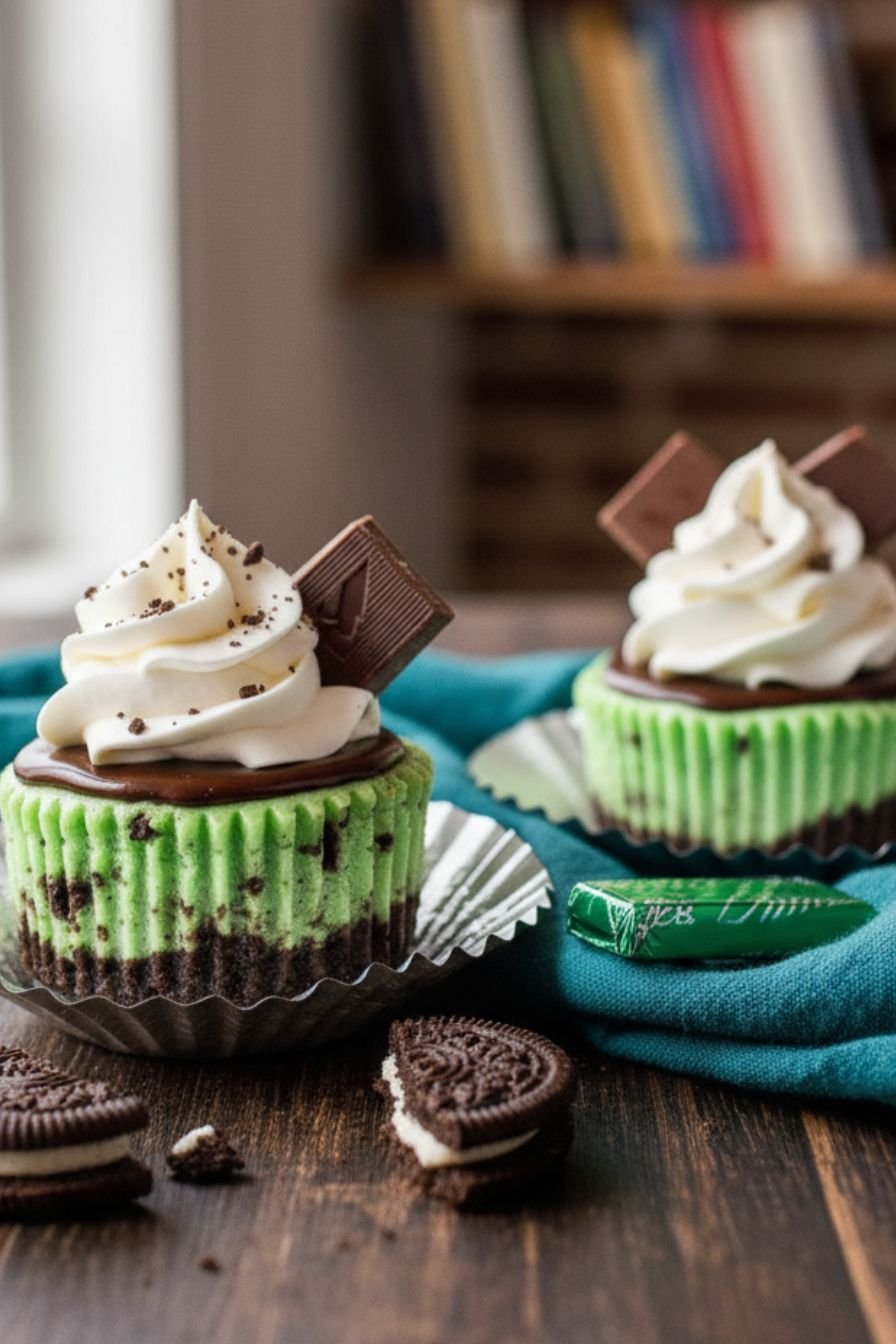
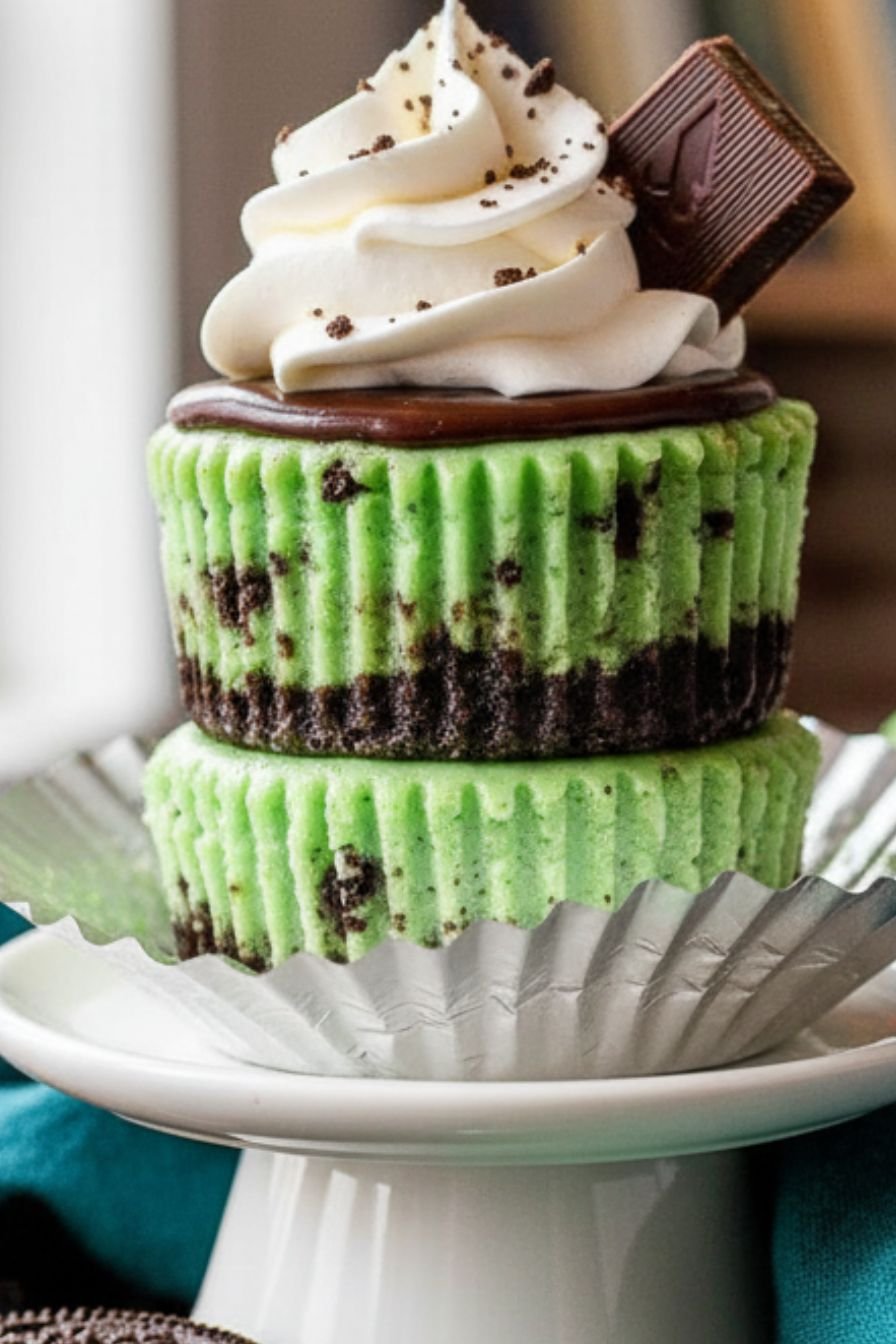
- Effortlessly Elegant: This no-bake mint chocolate cheesecake delivers stunning restaurant-quality results with simple, easy recipes techniques.
- Cool and Creamy: The refreshing mint filling and rich chocolate ganache create a perfect balance of flavors, making it an ideal dessert for any season.
- Make-Ahead Magic: Prep it the day before for a stress-free, impressive dessert that’s ready when you are.
My Journey to a Perfect Dessert
Hi, I’m Patricia from Patricia Universe. My love for easy recipes that don’t skimp on flavor is what inspired this creation. I wanted a dessert that felt special—something worthy of a dinner party or a holiday table—but that didn’t require hours of complex baking or a long list of hard-to-find ingredients. This mint chocolate cheesecake is the happy result of that quest. It’s the kind of simple recipe that proves impressive desserts can be accessible to everyone, even on a busy weeknight.
Why This Easy Cheesecake is a Game-Changer
Let’s be honest, traditional cheesecake can be intimidating. The water bath, the potential for cracks, the long bake time—it’s enough to make any home baker nervous. This recipe flips the script entirely. By skipping the oven, you eliminate the most common points of failure. The method is straightforward: a quick press-in crust, a creamy no-bake filling you whip up in minutes, and a luxurious chocolate topping that sets in the fridge. It’s the ultimate effortless dessert for when you want maximum impact with minimal kitchen time.
The Secret to a Foolproof No-Bake Cheesecake
The magic of this simple dessert lies in its technique. Ensuring your cream cheese is truly at room temperature is non-negotiable; it’s the key to a silky-smooth filling without any lumps. Chilling your mixing bowl and beaters before whipping the heavy cream guarantees it will reach those beautiful, lofty stiff peaks that give the cheesecake its light yet stable structure. Finally, patience is your best friend. Allowing the cheesecake to set fully in the refrigerator, preferably overnight, ensures every slice will be picture-perfect.
How to Customize Your Own Creation
One of the best things about simple recipes is how easily you can make them your own. Love coffee? Swap the peppermint extract for a teaspoon of espresso powder in the filling. Craving berries? Skip the ganache and top the set cheesecake with a layer of fresh strawberry glaze. For a festive touch, try adding a splash of crème de menthe (for adults only) to the filling for a more complex mint flavor. This recipe is a wonderful foundation for countless quick dessert ideas.
The Perfect Occasion for Easy Elegance
This cheesecake isn’t just for St. Patrick’s Day! Its cool, refreshing profile makes it a star at summer barbecues and picnics. The green and chocolate palette is naturally festive for Christmas. It’s also a stunning, make-ahead option for potlucks, baby showers, or birthdays when you want to contribute something homemade and beautiful without last-minute stress. It’s truly one of the most versatile no-bake desserts in my repertoire.
A Note on Ingredients and Tools
You don’t need any specialty equipment for this quick dessert. A hand mixer or stand mixer will make light work of the filling, but a determined whisk and some elbow grease will work in a pinch. I highly recommend using a springform pan—it’s the secret to releasing this beautiful dessert without drama. For the chocolate cookie crumbs, store-bought work perfectly, but blitzing Oreos (filling and all) in a food processor gives you that classic, nostalgic flavor that pairs so well with the mint. For a truly decadent chocolate dessert, use a high-quality semi-sweet or dark chocolate for the ganache.
The Full Mint Chocolate Cheesecake Recipe
The complete recipe with ingredients and step-by-step instructions can be found in the recipe card above.
Notes & Tips for Success
- For Clean Slices: Dip a sharp, thin-bladed knife in hot water, wipe it dry, and make a clean cut. Repeat for each slice.
- Storage: Keep the cheesecake covered in the refrigerator for up to 4 days. The crust may soften slightly over time but will still be delicious.
- Make it Gluten-Free: Use your favorite gluten-free chocolate sandwich cookies for the crust.
- Adult Version: For a more sophisticated mint flavor, add 1-2 tablespoons of crème de menthe liqueur to the filling, reducing the heavy cream by the same amount.
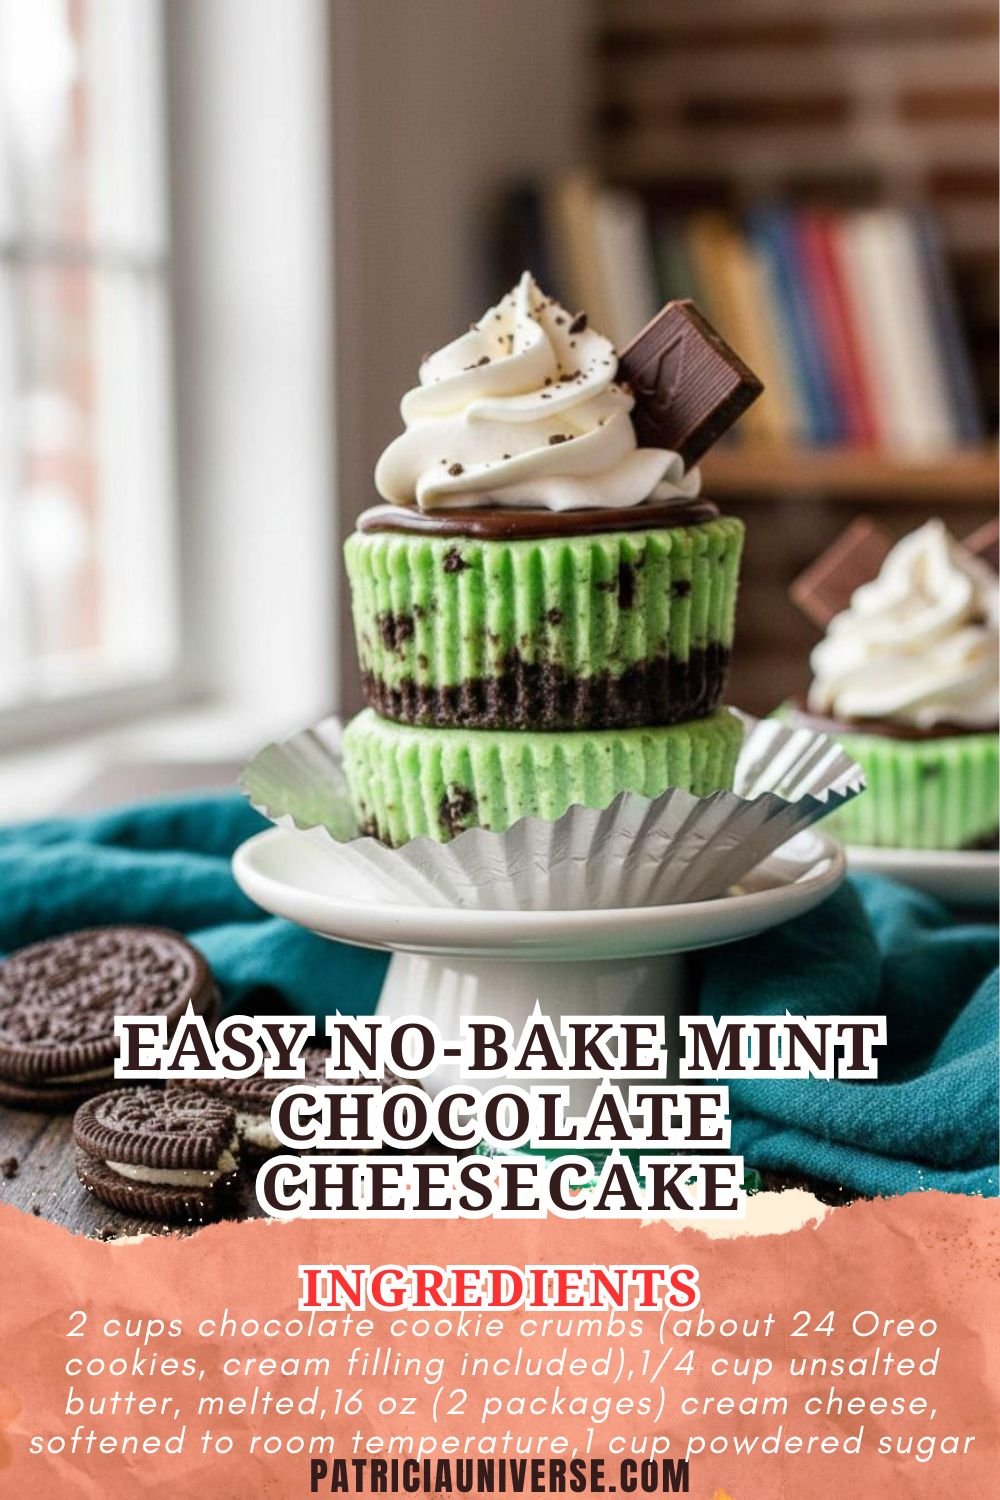
No-Bake Mint Chocolate Cheesecake
Ingredients
For the Crust
- 2 cups chocolate cookie crumbs (about 24 Oreo cookies, cream filling included)
- 1/4 cup unsalted butter, melted
For the Filling
- 16 oz (2 packages) cream cheese, softened to room temperature
- 1 cup powdered sugar
- 1 teaspoon peppermint extract
- 1/2 teaspoon vanilla extract
- Green food coloring (optional)
- 1 1/2 cups heavy whipping cream, cold
For the Topping
- 1 cup semi-sweet chocolate chips
- 1/2 cup heavy whipping cream
- Optional: Andes mints or chocolate shavings for garnish
Instructions
Prepare the Crust
- Line the bottom of a 9-inch springform pan with parchment paper.
- In a medium bowl, combine the chocolate cookie crumbs and melted butter until the mixture resembles wet sand.
- Press the crumb mixture firmly and evenly into the bottom of the prepared pan. Place in the refrigerator to set while you make the filling.
Make the Filling
- In a large bowl, beat the softened cream cheese with an electric mixer on medium speed until smooth and creamy, about 2 minutes.
- Add the powdered sugar, peppermint extract, and vanilla extract. Beat until fully combined and smooth.
- If using, add a few drops of green food coloring and mix until the desired color is achieved.
- In a separate chilled bowl, beat the cold heavy whipping cream on high speed until stiff peaks form.
- Gently fold the whipped cream into the cream cheese mixture until no white streaks remain and the filling is uniform.
Assemble the Cheesecake
- Remove the crust from the refrigerator. Pour the mint filling over the crust and spread it into an even layer with a spatula.
- Tap the pan gently on the counter to remove any air bubbles. Cover the pan with plastic wrap and refrigerate for at least 6 hours, or preferably overnight, until completely set.
Make the Chocolate Ganache Topping
- Place the chocolate chips in a heatproof bowl.
- In a small saucepan, heat the 1/2 cup of heavy cream over medium heat until it just begins to simmer (small bubbles around the edges). Do not let it boil.
- Pour the hot cream over the chocolate chips. Let it sit for 1-2 minutes, then whisk until the chocolate is completely melted and the mixture is smooth and glossy.
- Allow the ganache to cool for about 10-15 minutes, until it thickens slightly but is still pourable.
- Remove the chilled cheesecake from the refrigerator. Pour the slightly cooled ganache over the top, spreading it gently to the edges. Garnish with chopped Andes mints or chocolate shavings if desired.
- Return the cheesecake to the refrigerator for at least 30 minutes to allow the ganache to set completely before serving.


Leave a Comment